
Get our FREE Project Planning Guide
"*" indicates required fields
ideabox® needed more parking areas, but they needed to be permeable due to the city code. At the same time, we needed to make a tutorial on permeable pavers, so we figured we use this as an opportunity to help them to create more permeable surfaces and to help you learn how you can do the same thing at home.

Supplies Needed
To lay a permeable paver surface, you’re going to need some tools and materials.
Tools:
- Shovel
- Rubber Mallet
- Level
- Hand Tamper
- Plate Compactor
Materials:
- Stakes
- Stringline
- Gravel
- Perma-Edge
- Permeable Pavers
Steps to Complete
1. Design
The easiest way to start is to sketch your plans on a piece of graph paper. That way, you can use everything as a modular square foot, and you can pre-order your materials, like gravel and bedding material, and including your paving stones. Once you have an excellent design drawn out and you can move on to step two.
2. Layout
At some point before the excavation process, you’re going to want to make sure you call 811 and get a locate. The utilities will use marking paint to indicate any gas lines, electrical lines, water lines under the ground.

Once you know you’re not going to conflict with any utilities during your project, mark your layout. When I mark my layout, I always make sure I use white marking paint because it won’t get mixed in with the other colors.

Once you’re done marking (and feel confident in the size and layout of your project), mark an additional six inches outside the perimeter for your edge restraint.
3. Square
It’s essential to square your project before you excavate, so you don’t accidentally over-or under- dig. The easiest way to get your project square is to establish a straight line with most of your project.

Once you’ve established straight, you can move on to setting square, which by using the Pythagorean theorem or 3-4-5 Method, you can adjust your stakes and string lines to have a nice square corner to work from.
4. Set the grade
With most paver projects, you’ll want to establish a finished grade with a string line level or get as close as possible to any surface that you’re meeting up—then adjust it to level. However, with permeable paving stones, you don’t have to worry about grade because water drains right through permeable pavers.
5. Excavate
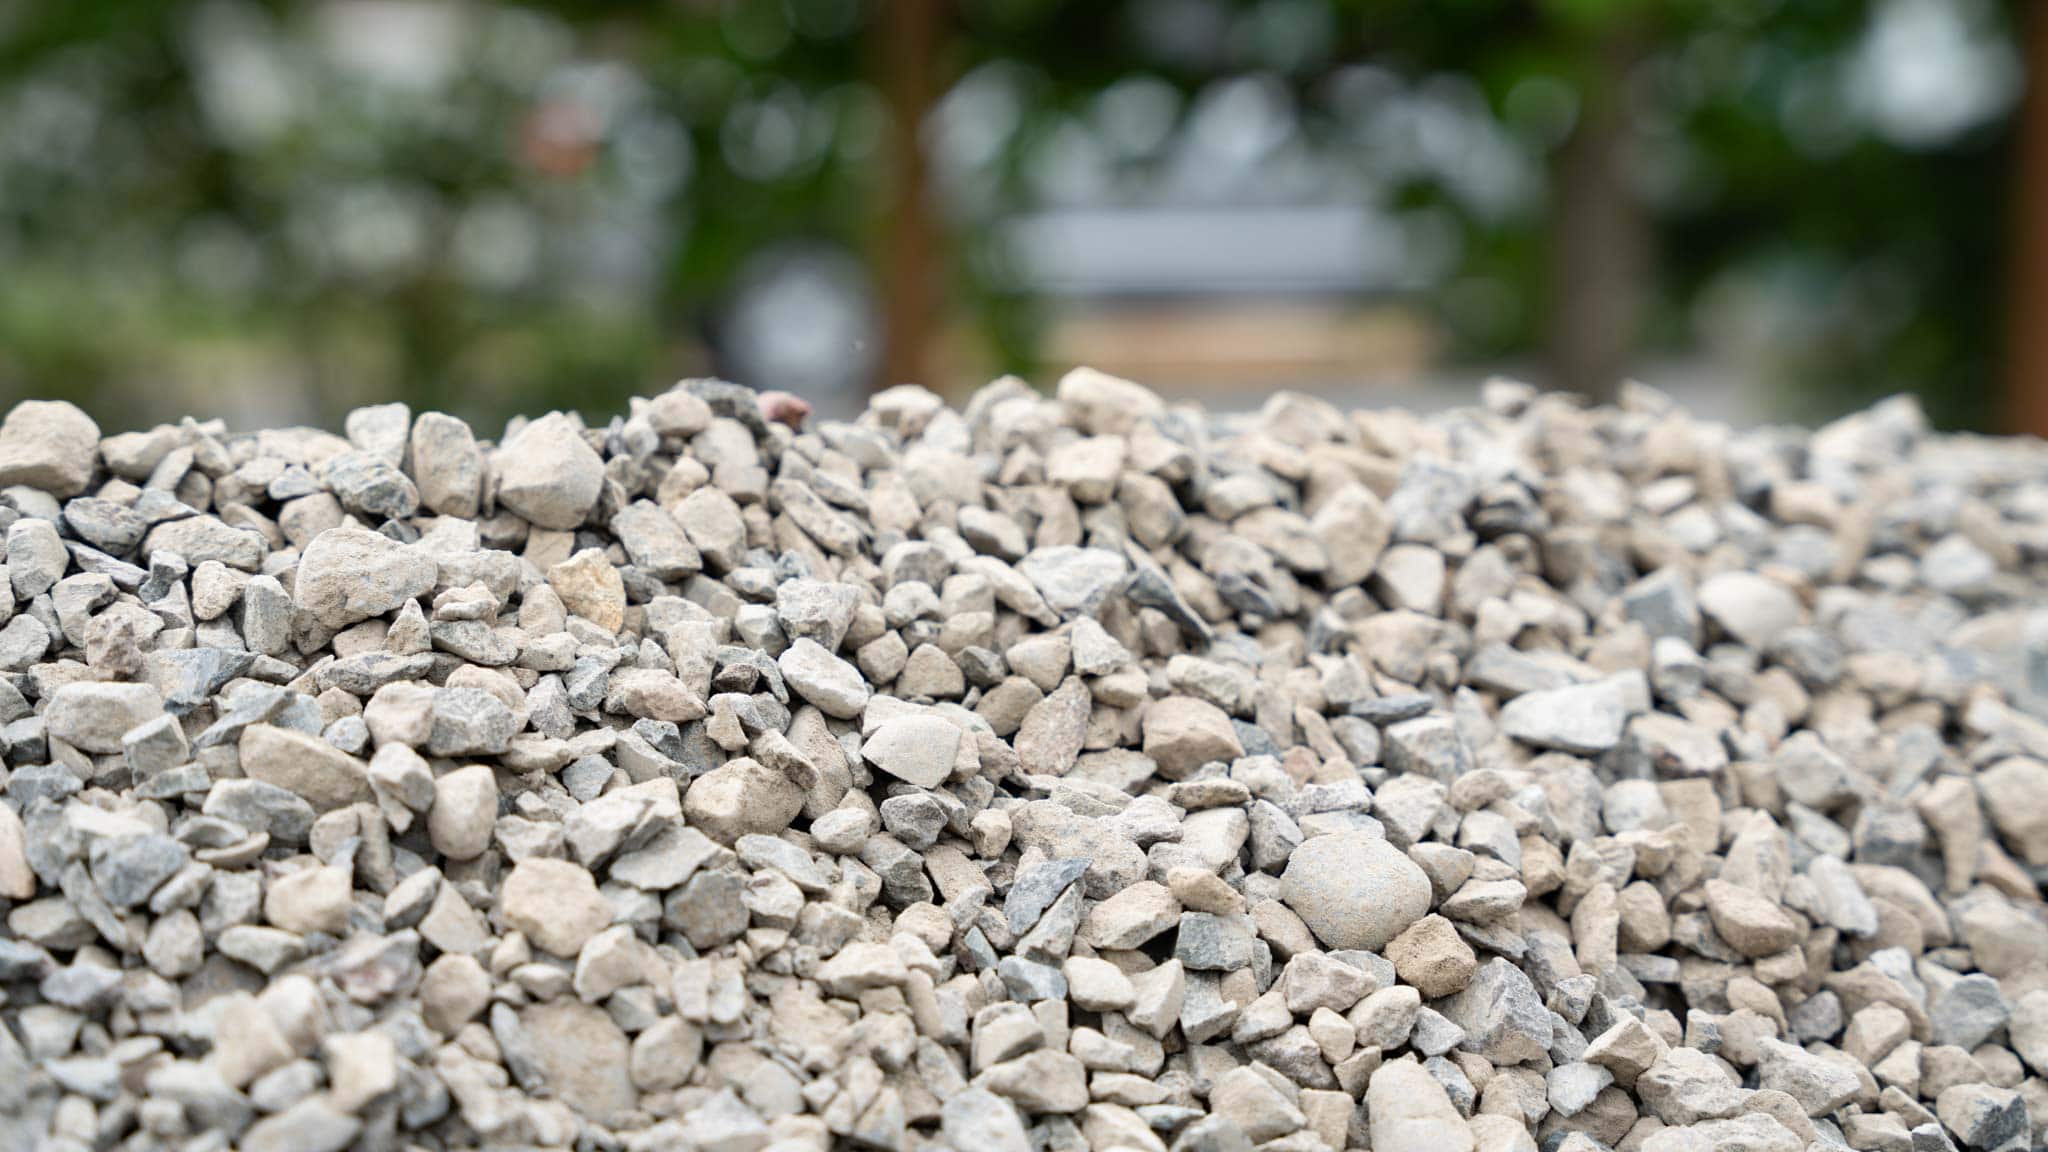
Excavation for permeable paving stones is a little bit more in-depth than non-permeable pavers, literally and figuratively. Meaning, you have to add at least 30% more gravel base per pedestrian traffic or behavior traffic area.

In this permeable paver project, we used 9″ of crushed ¾-0 open rock as our base, 1″ of ¼-10 as our bedding, then laid paving stones on top that are just over 3″ tall each. Add that together, and you get a total of 13–14 inches of excavation. That’s how you know how deep you need to dig.

With that number in mind, excavate below the surface of your project. The easiest way to remove this much dirt is with a small excavator. However, if you have a smaller area, you can definitely dig by hand.

Pro Tip: Make sure you have a locate done that way you don’t hit any utilities. It could be costly and slow down your project dramatically.
6. Base
Before you fill your hole with gravel, make sure you lay down a layer of filter fabric. With most paving stones, you’ll want to lay geotextile, which is non-permeable. However, because this is a permeable surface, you’re going to use a filter fabric.
Pro Tip: Filter fabric is a structural filter fabric that keeps dirt from migrating into your gravel.

With your filter fabric in place, you can start bringing in your gravel. We’re using ¾-0 clean aggregate, which is just crushed ¾-0 rock that has no fines. The reason for this is so that water can quickly drain through the rock into the earth.

Compact this in 2” lifts to make sure you have lots of compaction. Because we needed 9” of gravel, we repeated this process 4–5 of times to achieve the correct compaction.

After bringing up your gravel in 2″ lifts, you get that full 9″ of compacted gravel. If you feel like you’re pretty close and flat, you can take a nice board or 2″ x 4″ and rake the rock around to make sure it’s perfectly balanced.

After that final compact, you can move on to step seven: screed your bedding layer.
7. Screed
For your bedding layer, you’ll need to use ¼-10, which is crushed open, fine gravel that provides excellent permeability and structure. Before you lay your bedding, spread a layer of geo-grid across the for extra-base stability. Then place 1” screed rails and spread that ¼-10 around.

Once you’ve got a consistent layer of ¼-10, you’ll want to screed it. To this, we notched a 2 x 4” and used it to help make sure we matched up perfectly with the asphalt next to our project.

If you need to do a similar thing, add an extra ¼” of margin to compact your paving stones if they can be compacted. With the bedding layer in place, you can move on to step eight, laying the pavers.
8. Lay your stones
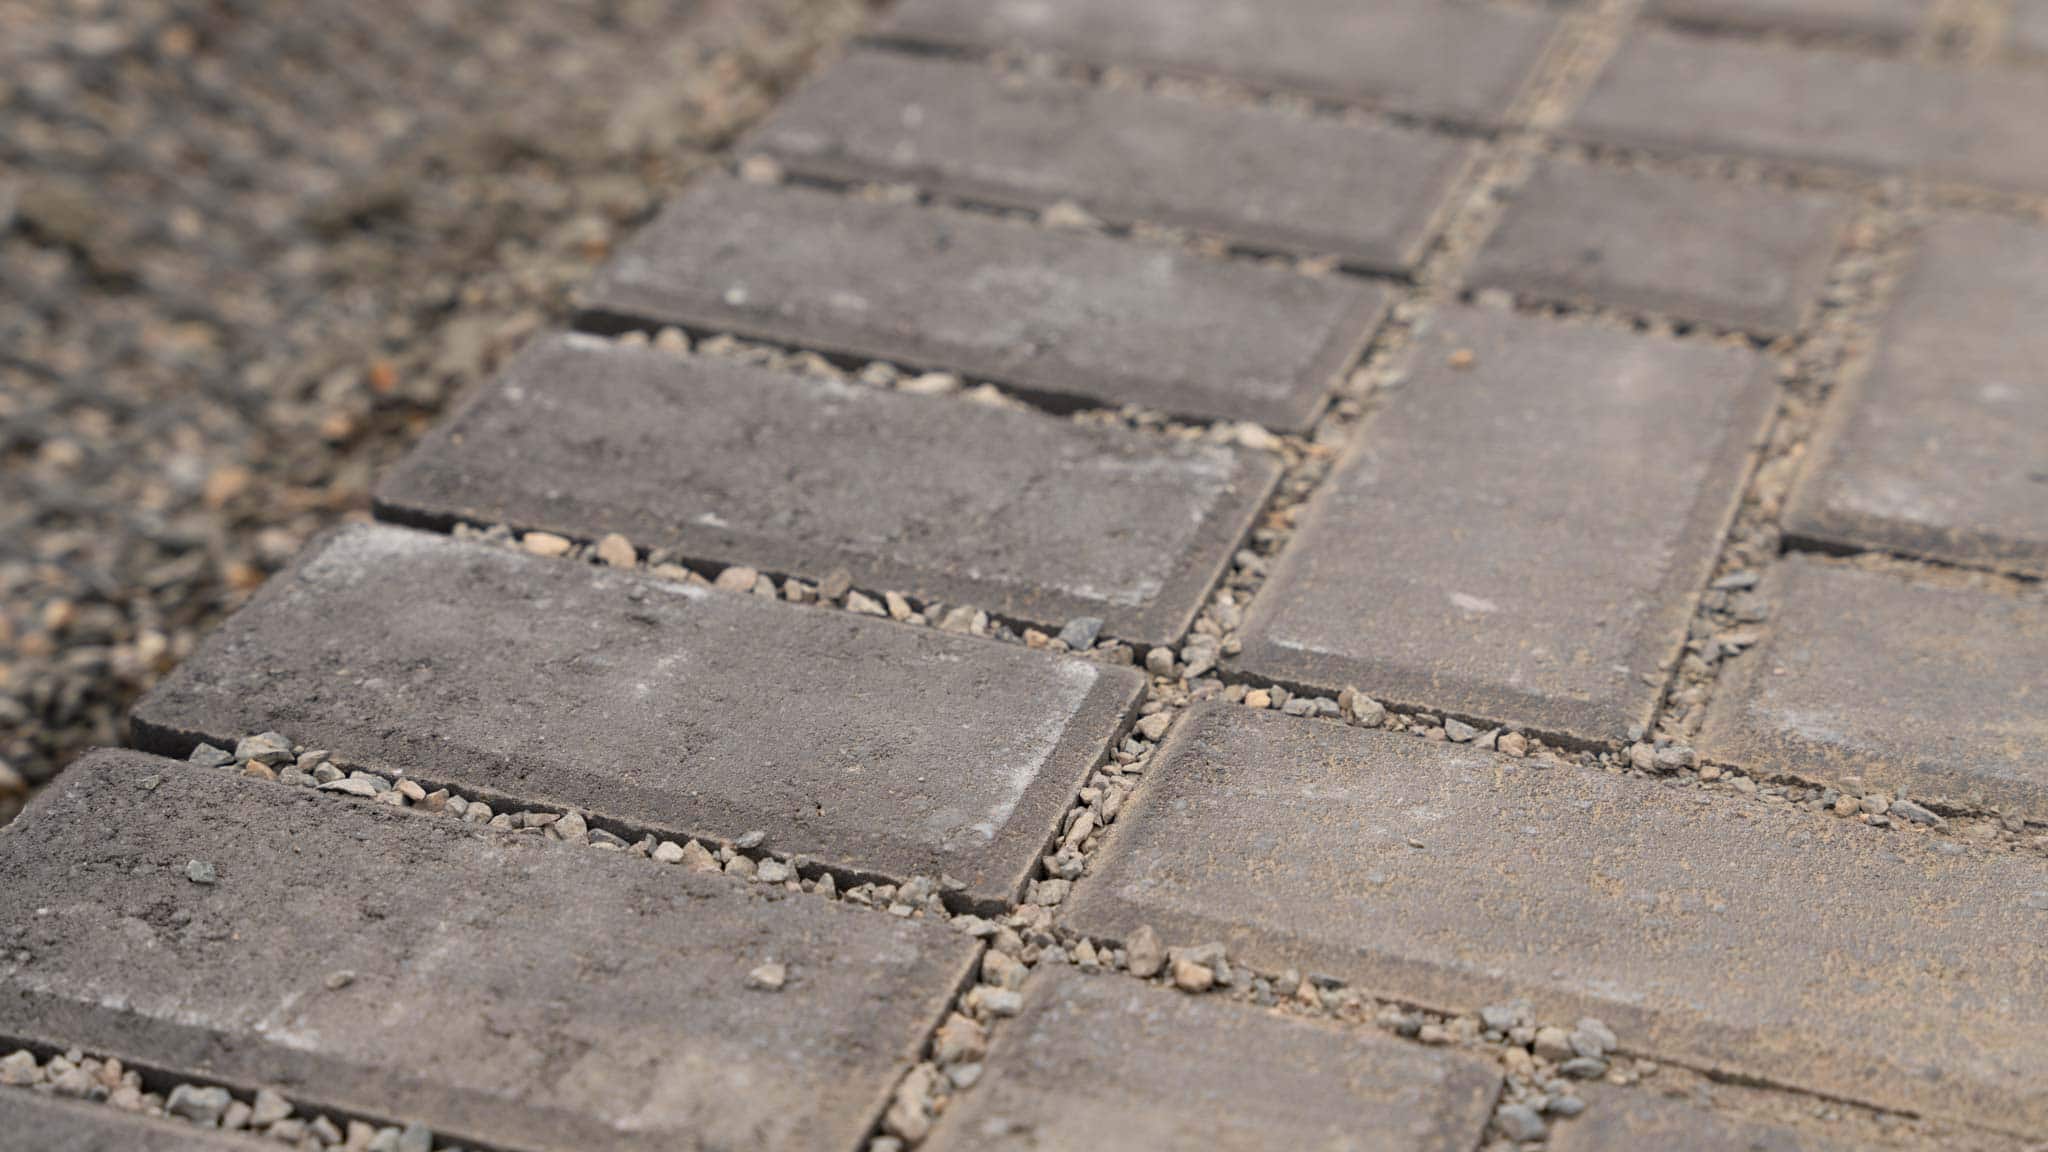
For this project, we used 80mm Pewter Holland Permeare. They are permeable and thus have much larger spacer bars. The reason is so you can fill the joints with ¼-10. For the most part, that’s what makes these stones so permeable.

We’re laying the herringbone pattern, with one soldier course border on a couple of sides. The nice thing about this stone is it has full- and half-stones. Therefore, you don’t have to worry about making any cuts to achieve the pattern.

Once you’ve got your whole field laid, you can move on to step nine: edge restraint.
9. Edge restraint
We used Perma-Edge for our project, and we’d recommend you do the same. You can read more about why we love Perma-Edge and how to use it in How to Install Perma-Edge.

To use Perma-Edge, all you have to do is scrape gravel away from your edge with a trowel, mix it up in a wheelbarrow, and slap it on, right on top of your geo-grid.

Now that you have your edge restraint in place, you can go ahead and move on to the last step of your project.
10: Finish
The final step includes sweeping in your joints, compacting your stones, and covering up your edges. To start, you’ll want to sweep in ¼-10 right on top of your pavers.

Continue sweeping all your joints are full, up to an ⅛” bevel below the edge of the pavers.

Once you’ve filled your joints, compact your stones one last time and spray off your permeable pavers to make them shine. At this point, you can walk on your pavers and drive on your pavers.
Find the perfect permeable paver
Get started on the process of installing your permeable paver patio, driveway, or walkway by taking our Paver Finder quiz. Depending on the selections you make, our quiz will give you a personalized recommendation so you can easily find the perfect product for your application.
Get our FREE Project Planning Guide
Tell us where to send it and we’ll email the backyard planning guide to you right away!
"*" indicates required fields


