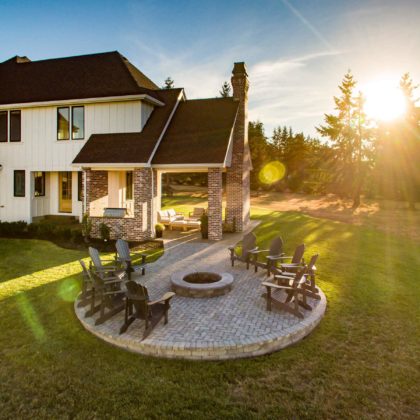
Building a raised paver patio is an excellent option for homeowners who want to expand or raise their outdoor entertainment area and create a cozy, relaxing spot.
In this blog post, we will show you exactly how simple it can be to build the perfect raised paver patio – from obtaining materials and planning out design details through installation—so that you can be sure you get results that will both look great and last.
Steps to Complete
Step 1: Design Your Patio
The first step to any hardscape project is design. We always recommend using a piece of graph paper to utilize each square as a modular square foot for the needed materials. Since this project is about how to do a raised paver patio, you will need materials like a wall block, capstone, and adhesive. You’ll need lots of ¾”-0 gravel, bedding material, and joint sand. You can pre-order all of your materials to have them ready for when you start your project.
Step 2: Mark Your Patio Layout
After drawing up your design, you can go into step two, the layout. We always recommend using white marking paint when marking your layout because it is the only color that does not indicate a utility. Before you excavate, you want to make sure you request a locate of underground facilities. They may get confused if they see any other color other than white.
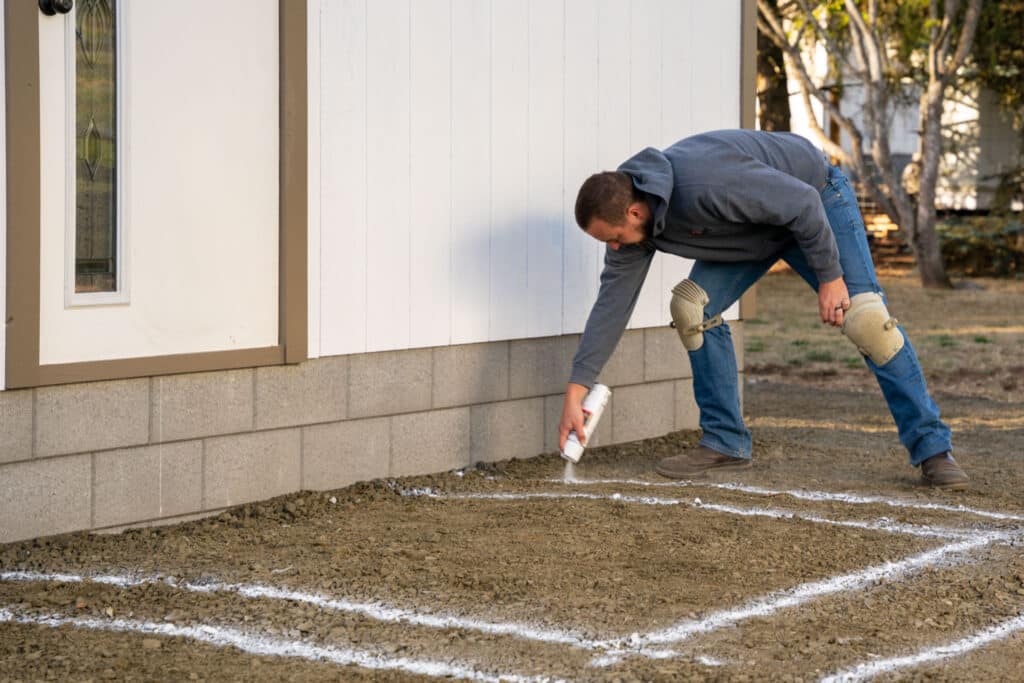
Even though it involves a lot of gravel, one of the most excellent things about a raised patio is that you only need to excavate a trench for your wall block. At this point, mark a trench for your wall block with marking paint. Then you can move on to the next step.
Step 3: Set Square and Establish Finish Grade
After you’ve painted your reference lines, you can work on getting it square and setting your grade. The first thing to do is stretch a string across your foundation to establish straight. To do that, get that string as close as possible to the foundation without touching it.
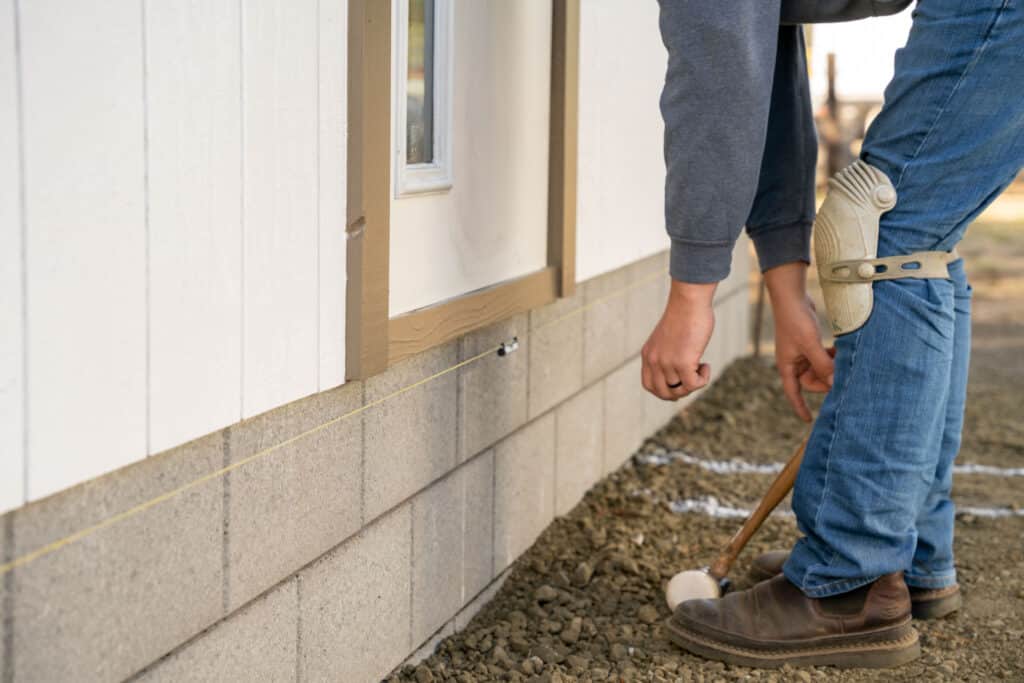
Once you’ve achieved that, you’ll set it to the reference for your grade. When you finish the project, the finished grade is where you want the top of your paving stones to be. We will go about an inch below the siding for our sample project. Once we achieve that, we need two perpendicular reference lines for both the outsides of our walls and the outsides of our pavers. We also need to set them for grade.
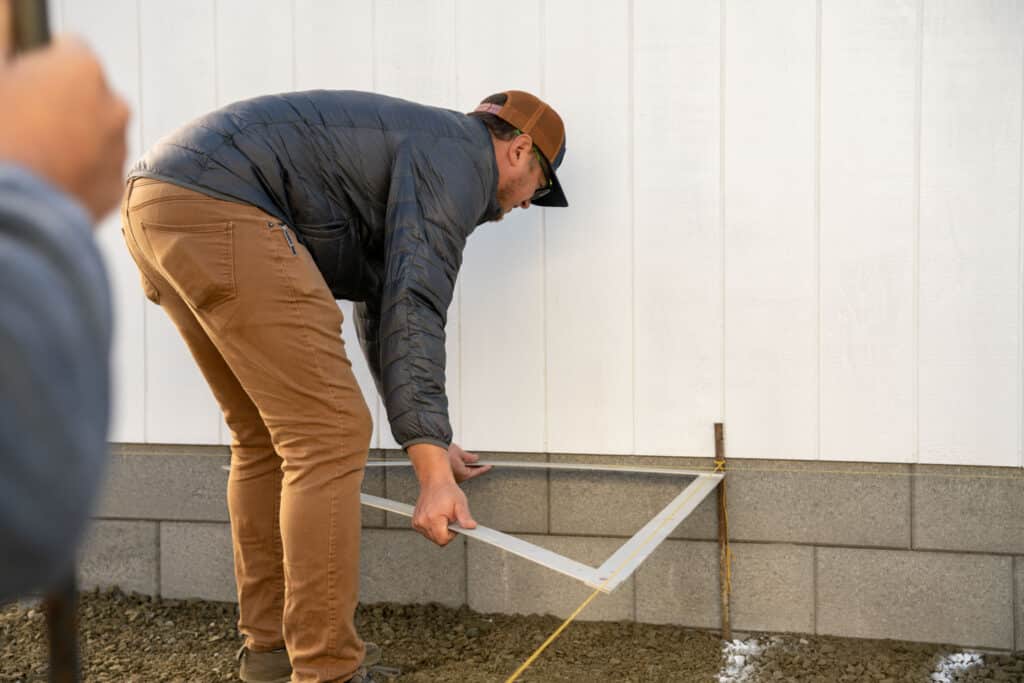
To make a perpendicular intersecting line, we use a 3-4-5 triangle and a string line level to make it level with the first initial line. Then we’re going to drop them both for the grade. After that, we have all our grades and square reference lines in one volley.
Step 4: Excavate a Raised Wall Trench
You’ve got all of your string lines up. You have string lines for reference on the top of your paving stones, where you’re done with the project, square and straight. With any retaining wall project, you need at least 4” of embedment, half of a wall block, and 6” of compacted gravel below that. So, below this native soil in our sample project, we’ll have about 10” of excavation. We will have a subsequent course to bring us to the correct height that we want, as well as a capstone, which is again what the string line references. Overall, we will have about 25” below the bottom of the string line as a reference for our excavation and the trench of this wall.
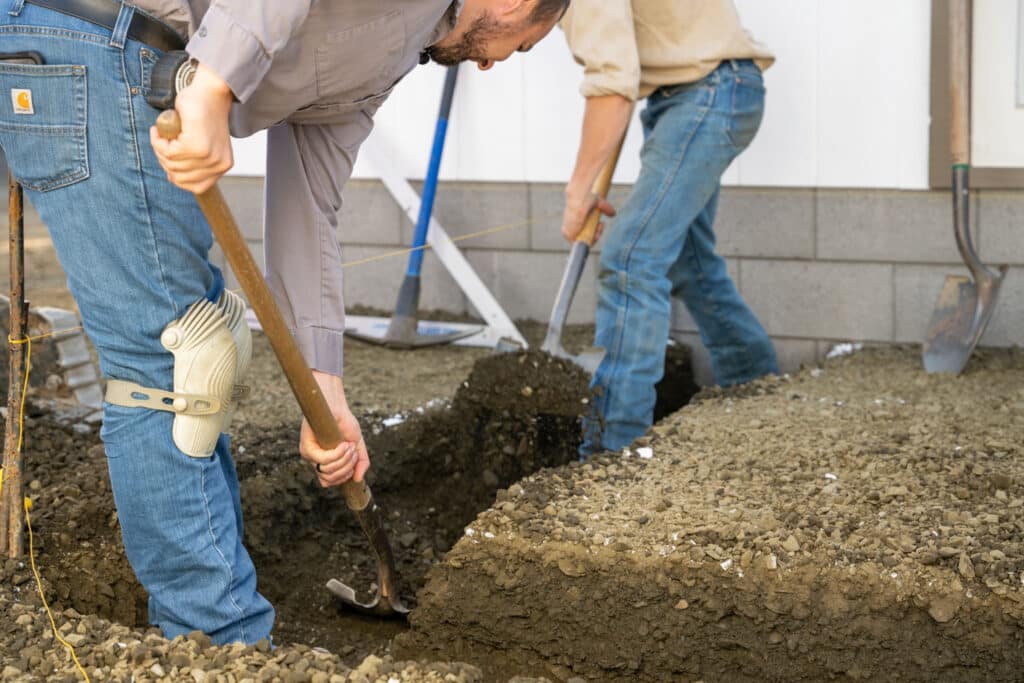
The cool thing about raised patios is that you typically don’t have to excavate more than just the trench for the wall. If you have any sod or grass, you will remove that. But most of the time, you can start from virgin soil, dig just the trench for your wall block, and build up from there.
Step 5: Lay a Gravel Base and Your First Course
When you’ve excavated your trench for the wall block at your desired depth and width, it’s time to bring in your gravel base and start setting your base course block. We need at least 6” of compacted gravel in our sample project. We will bring that in 2” lifts. We will use our string lines as a reference, just like we did when we excavated. We’re going to be measuring the difference for 6” of gravel.
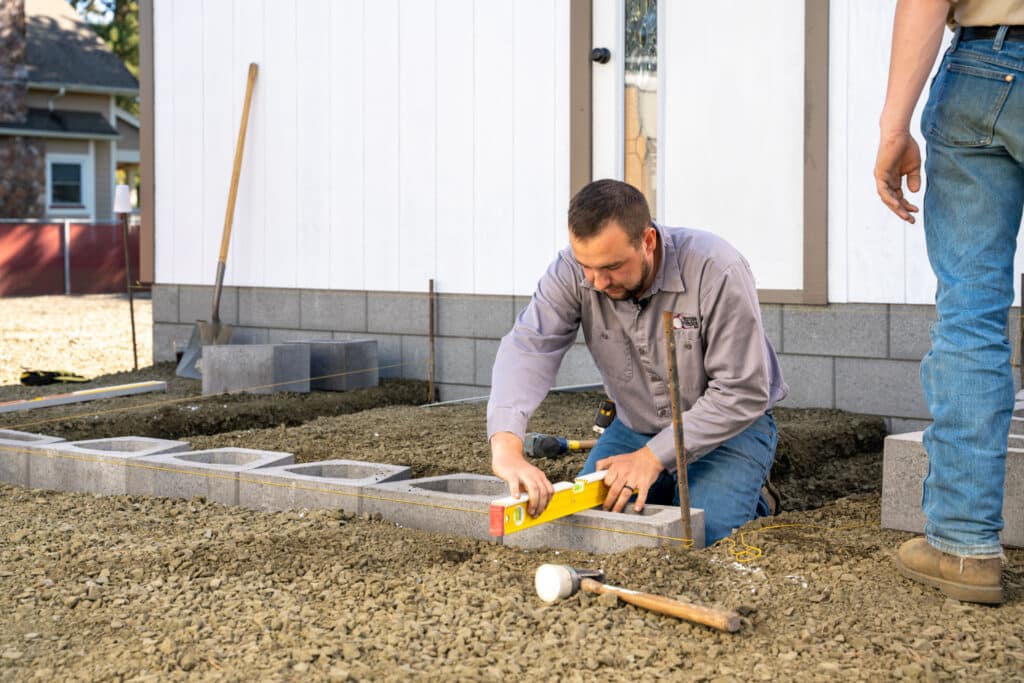
Once we have that in there, and it’s nice and compact, we can set the wall blocks. We usually set wall blocks level each way—side to side and front to back. We’ll be doing that for the front wall of this particular project, but because we want a slope to our paving stones, the easiest thing to do is to slope the side walls a little bit to that same grade. So you use the string line and measure down from it to get that block to the correct grade, even if it’s just a little slope. Once you’ve achieved that, you can move on to the next step.
Step 6: Backfill and Lay Subsequent Courses
It’s time to backfill and stack your subsequent courses. First, you must fill the cells of your blocks with gravel so that you can compact them behind. In our sample project, there’s a natural subgrade that we want to compact just for good measure before we insert our geotextile.
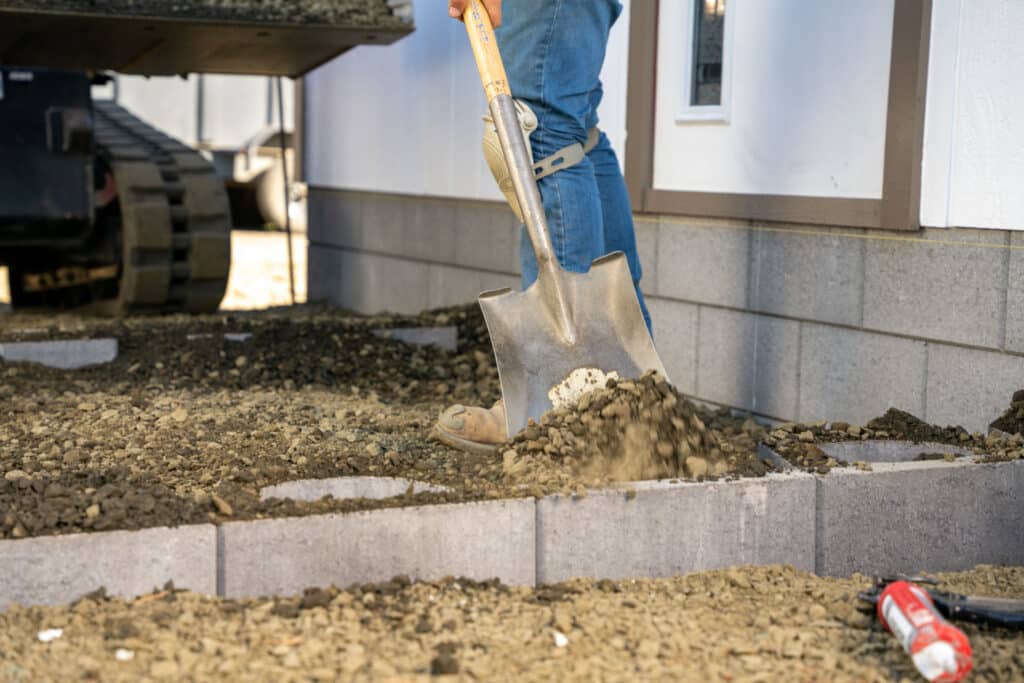
After the geotextile is there, we can continue to build up in 4” lifts of gravel at most because that’s what our compactor is rated for. But once we flush with this base course of block, we can glue on our second course—like Surebond Flexible Adhesive. It will be a straight-up wall; we’re gluing it on because it’s just a short, two-block wall. If you’re going to go substantially higher, something 3’ or more, we recommend using our modern standard block, which has a lip.
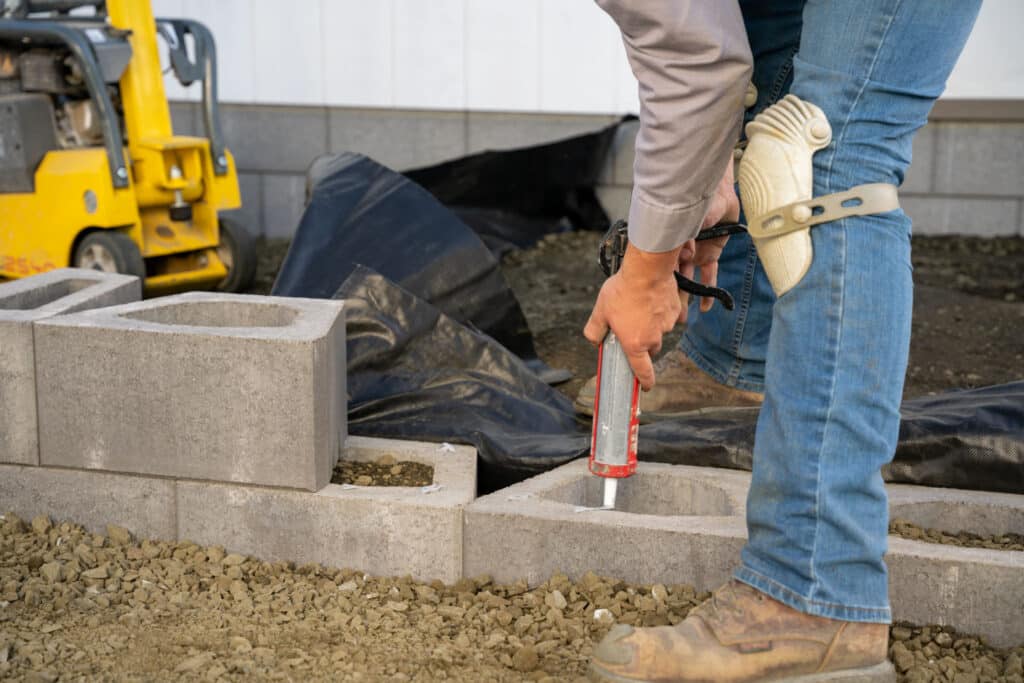
After you’ve glued the second course, you can fill those cells with gravel and then continue backfilling and compacting in 4” lifts of gravel.
Step 7: Add a Patio Wall Cap Border
Before moving on to the bedding material for your paving stones, you must put on the capstones. The type of capstone we’re using is Monaco Coping. It’s an excellent, round, bull-nosed product.
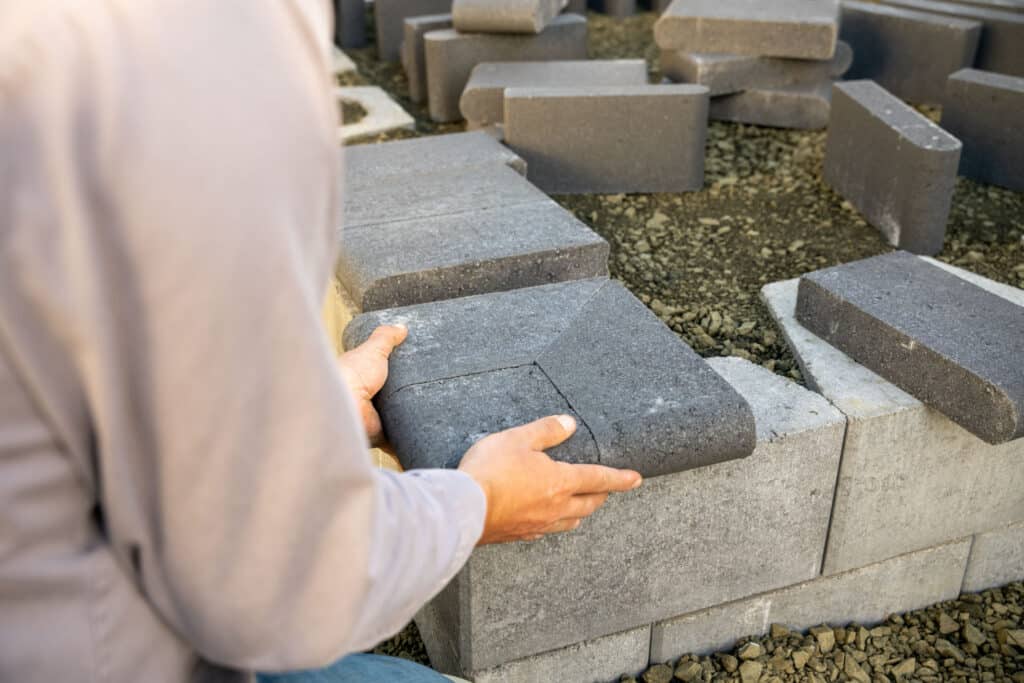
When using Monaco Coping, you must do a four-cut miter in the corner, so it is easiest to start from the corner and work your way out. If you want to know how to cut a miter corner, watch our video, “How to Cut a Miter Corner.”
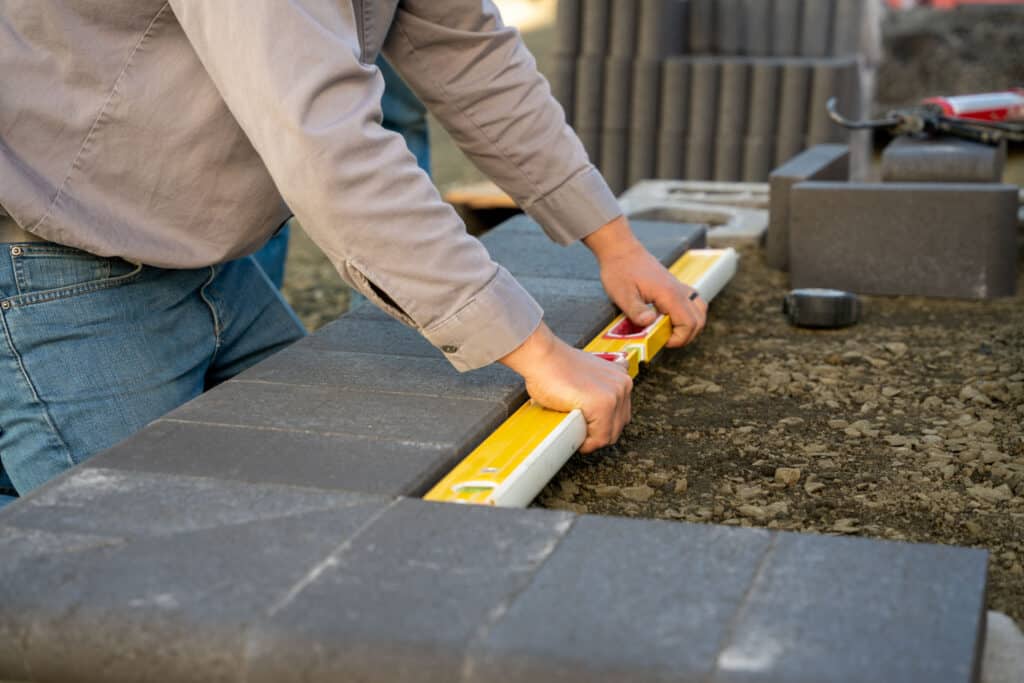
Before you glue the caps on, clean off the blocks with a brush, broom, or blower, and then use a suitable adhesive like Surebond 20. It’s flexible and works well. After you put down the glue, throw your capstones down, and then you can move on to the next step.
Step 8: Screed Your Patio Bedding Material
The type of bedding material we use in this step is washed quarter #10. It’s a quarter-inch crushed aggregate. It retains no moisture compared to traditional concrete sand, which we like to utilize here in the Pacific Northwest. You also want to use something 1” in outside diameter.
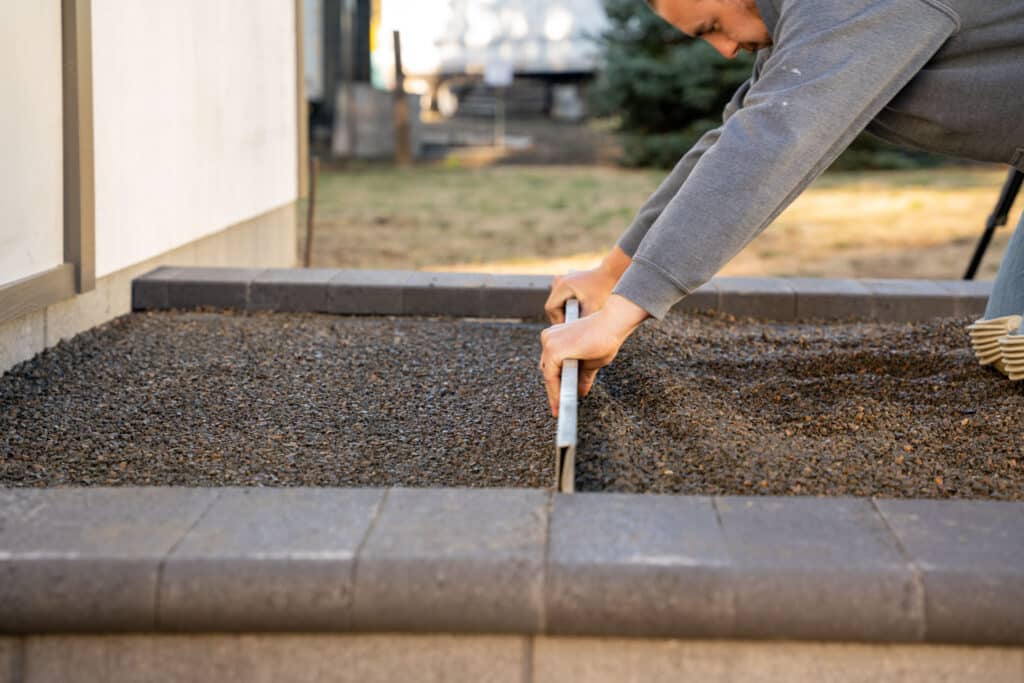
We have 1” square tubing, but you can use 1” outside round metal tubing. In short, whatever works and is 1” in outside diameter is a proper tool. We’re using a screen board in our example, but a good, flat 2×4 will do the same. You will screen this out, and then you can move into step nine, laying your paving stones.
Step 9: Lay and Cut the Paver Field
Now it’s time to lay your paving stones. In our example, we’re using Arena Stone. They’re just a 12”x12” square paver. Because we already did our caps, we’re going to make sure that everything is square one more time, and we’re going to lay from the center out.
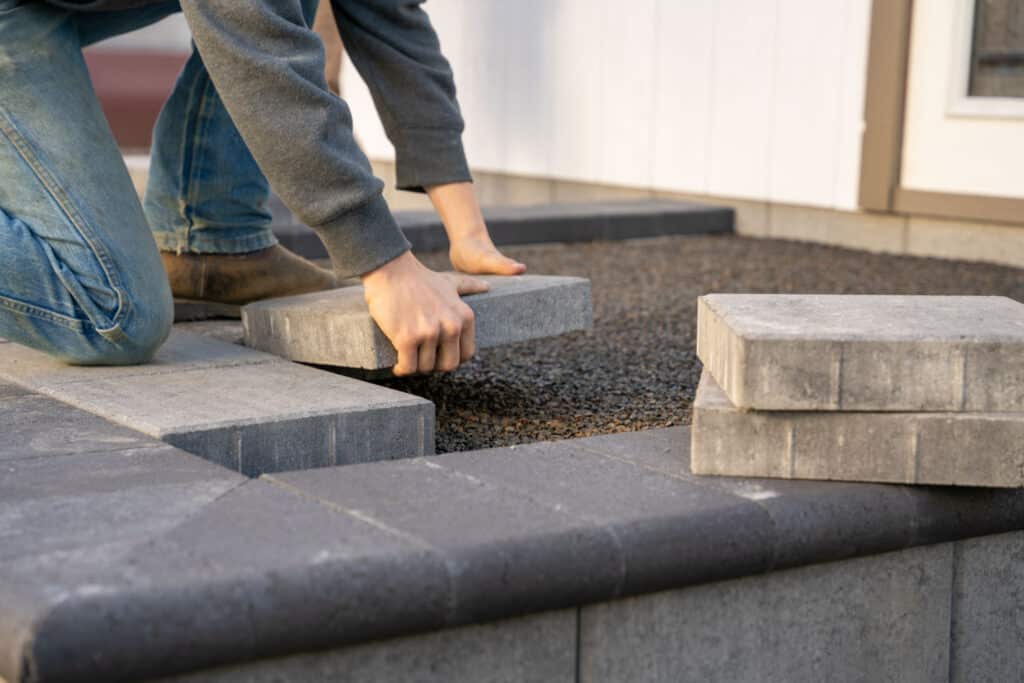
If you have to do any cuts in your project, watch our video, “Six Ways to Cut a Paving Stone.” You’ll need to take your stones, have a center reference mark, and start laying them out.
Step 10: Finish the Raised Patio
At this point in our sample project, we’ve finished laying our field of pavers, and we just had a few cuts along the edges. Typically, we’d have an edge restraint. Because our example is a raised patio, we have our capstones, and they’re glued as our edge restraint. So now we can move on to the final step, finishing the patio. We’re going to be plate compacting our stones. We have a roller attachment on the bottom of our plate compactor to help reduce any of these stones from being broken.
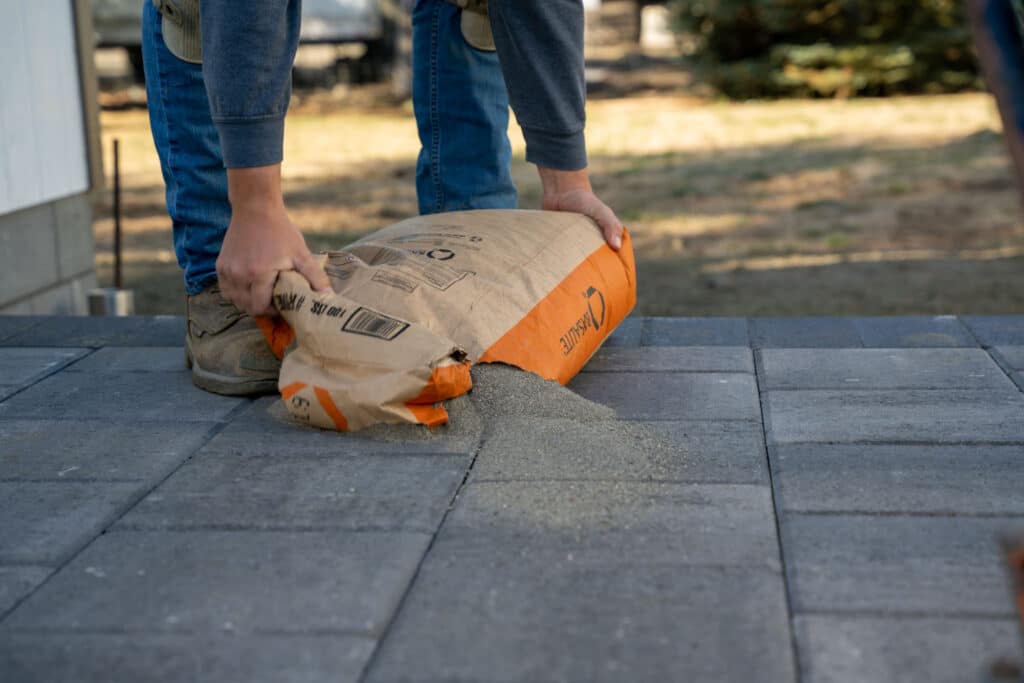
At this point, you’ll want to bring in your joint sand. We typically like to overfill our sand joints. That way, we can use the plate compactor again to compact and work that sand into the joints.
Once you finish that, you can blow and sweep it off and have your finished project.
Download the Paver project planning guide
If you are ready to start your paver project, we have a guide that might help. Download our free Project Planning Guide so you can be prepared before you start your project.


