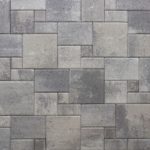
Modular Retaining Walls describe a type of easy do-it-yourself retaining wall blocks. These blocks can be used to retain soil on slopes and the individual blocks interlock together without any mortar or pins. Here are some helpful hints to enable you to achieve success with a retaining wall project. For more assistance, contact our helpful office staff.
General installation guidelines apply to all lip-type retaining walls.
Currently applies to the following Western Interlock products: Slope Block™, Nursery Stone™, Jumbo Nursery Stone™, and Gradino™ Wall.
Step 1:
Planning your Project
Before using a modular retaining wall block to build a wall, the following design considerations must be made:
a) For a typical landscape wall, the total wall height must not exceed 36″ (1.2 m).
b) If a toe slope is present, the bottom of the wall should not be above the finished grade at a distance of 48″ (1.2 m) in front of the wall.
c) The embedment height needs to be a minimum of 6″ (152mm) below the ground surface.
d) The length of the reinforcing geogrid needs to be a minimum of 48″. Geogrid length is measured from the face of the wall.
Step 2:
Preparing the Base
Check the location of existing structures and utilities before starting the excavation. Excavate the soil in the location where the retaining wall is to be by digging back into the slope, assuring adequate space on the rear side of the wall for gravel backfill. The amount of gravel fill will vary on the application, but should not be less than 12″. Dig a trench for the first course of stone 30″ wide by 12″ deep. Fill the first 6″ of the trench with ODOT ¾”-0 gravel and compact well, making sure that the gravel is level. Place filter fabric against the back wall of the excavation. (Refer to the diagrams)
Step 3:
Setting the Bottom Course
Set the bottom course of block at the desired position on top of the prepared gravel. If the block has a rear lip, it will be necessary to carefully knock the lip off using a hammer. Using a large rubber mallet and a level, adjust the block until it is level, front to back, and side to side. Set the adjacent blocks in the same manner, using a string line or a level to keep long runs straight and flat.
Step 4:
Setting Remaining Courses and Back Filling
Set the next course, making sure that the joints do not line up with the previous course. Backfill with ODOT ¾”-0 gravel and compact again before setting the next course. Place all the remaining courses until the wall has reached your desired height. Use the compacted gravel backfill to keep it straight by tamping lightly behind the rear of the stones, maintaining the same vertical angle from top to bottom.
Step 5:
Finishing the Wall
Set the top course and backfill to within 3″ of the top. Finish the backfill area with soil to the desired height. The top course can either be held in place by gravity or fixed with an approved flexible adhesive. Modular walls can be capped off with Murata™ Cappello, Arena Stone, or any wet-cast caps if desired.
Typical Modular Installation Diagrams
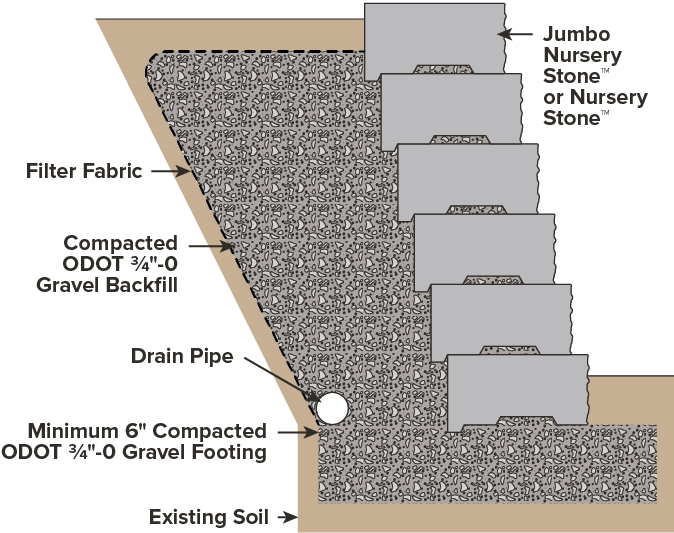
Notes:
- A drainage pipe should be used as shown in illustrations to prevent a problem with excessive water in the retained area.
- The standard wall angle set back is 12°. If a different angle is required, then the angle the first course is set at must be adjusted to accommodate the different angle. This angle is maintained as the following courses of stone and gravel are placed.
- Engineering is required on walls over 36″ high. Call the manufacturer for details.
- Cutting will be necessary for 90° corners and possible to maintain the batter on the different courses.