Get our FREE Project Planning Guide
"*" indicates required fields
A leaning retaining wall is more than just an eye-sore, it’s a signal that something has gone wrong. Understanding the severity and your repair options is critical because not all leans are equal. Minor, stable leans may need different approaches than walls showing serious structural compromise. This guide walks you through diagnosing your leaning wall, understanding repair options, and most importantly, fixing it in a way that prevents recurrence.
Understanding Why Walls Lean
Before you can fix a leaning wall, you need to understand what caused it to lean in the first place. Treating symptoms without addressing root causes guarantees the problem will return, often worse than before.
Hydrostatic Pressure from Poor Drainage – This is the most common culprit. When water accumulates behind a retaining wall without proper drainage, it creates enormous pressure pushing the wall forward. Even well-built walls can’t withstand sustained hydrostatic pressure. Missing drain pipes, clogged drainage systems, or inadequate gravel backfill all contribute to this problem.
Inadequate or Failed Base Foundation – Retaining walls need solid foundations. A base that’s too shallow, poorly compacted, or built on unstable soil will settle and shift over time. As the base moves, the wall above it leans. This is particularly common when the first course isn’t buried below grade as it should be.
Insufficient Backfill Compaction – The soil and gravel behind your wall need proper compaction. When backfill settles after installation, it creates voids that allow the wall to shift backward at the base while the top leans forward. Native soil used as backfill (rather than proper gravel) amplifies this problem.
Missing or Improper Setback Angle – Retaining walls should lean slightly back into the soil they retain. This “batter” is achieved by setting each course back three-quarters of an inch from the course below it, creating a standard 12-degree angle. Walls built perfectly vertical lack this inherent stability and are more prone to leaning forward under pressure.
Soil Conditions – Clay soils typically swell when wet and shrink when dry, creating cyclical pressure that gradually pushes walls forward. Soil with poor load bearing capacity can’t support the wall’s weight, leading to settlement and lean. These soil issues often require more extensive solutions than simple drainage improvements.
Missing Geogrid Reinforcement – Walls approaching or exceeding 36 inches in height need geogrid reinforcement extending back into the soil mass. Without this reinforcement, taller walls rely entirely on their own mass to resist soil pressure, and they often lose that battle.
External Factors – Tree roots seeking moisture can penetrate behind walls and create pressure. Added weight above the wall (new construction, heavy landscaping, or soil buildup) increases pressure beyond what the wall was designed to handle.
Understanding what caused your wall to lean is crucial because it determines the appropriate repair strategy. Fixing drainage might stabilize a minor lean caused by hydrostatic pressure, but it won’t help a wall that’s failing due to inadequate base foundation. Some causes are within reasonable DIY capability to address, while others will require professional intervention and expertise.
Assessing Your Leaning Wall
With this in mind, the first step is to accurately assess the severity and nature of your wall’s lean.
Measuring the Problem
Use a four-foot level held against the wall face to measure how far the top of the wall has moved from plumb. Place the level vertically on the wall, note where it touches at top and bottom, then measure the gap between the level and the wall at whichever end shows separation. This measurement tells you the degree of lean over that four-foot span.
Document the lean with photos and measurements from multiple locations along the wall. Be sure to date your documentation for future reference. If you’re unsure whether the lean is progressing, repeat measurements every few weeks. Progressive lean indicates active failure requiring immediate attention.
Interpreting the Severity
Minor Lean (Less than 1/4 inch) – Walls with very slight lean that hasn’t progressed may be cosmetic concerns rather than structural failures. Monitor these carefully, but immediate reconstruction may not be necessary if the wall remains stable.
Moderate Lean (1/4 to 1/2 inch) – This range indicates a problem requiring attention. The wall is under stress and will likely continue leaning without intervention. Drainage improvements may stabilize the situation if caught early and if drainage is the primary issue.
Serious Lean (More than 1/2 inch) – Significant lean signals structural compromise. The wall has moved beyond minor stress and into failure territory. Reconstruction is almost always the only reliable solution.
Critical Questions
Is it getting worse? Progressive lean—even if currently minor—indicates active failure that will accelerate. Stable lean might be managed with drainage improvements. Document over time to determine which you’re facing.
Where is the lean? Lean concentrated at the top suggests the wall is rotating forward, often due to pressure or missing setback. Lean at the bottom indicates base failure or settlement. Uniform lean along the entire height suggests the whole system is shifting.
How tall is the wall? Walls exceeding 36 inches require engineering. If your tall wall is leaning, professional assessment isn’t optional—it’s necessary for safe, compliant repair.
Are there other signs? Look for cracks in blocks, separation between courses, water staining on the wall face, or saturated soil behind the wall. These symptoms help identify the underlying cause.
DIY vs. Professional Decision
Minor lean on a short wall (under 36 inches) with identifiable drainage issues and no progressive worsening might be addressed through DIY drainage improvements and monitoring. However, any of these factors push the situation toward professional help:
- Progressive lean that’s worsening over time
- Drainage failure requiring extensive excavation
- Walls at or exceeding 36 inches (engineering required)
- Lean exceeding half an inch
- Signs of base or foundation failure
- Walls critical to property stability
- Uncertainty about the cause
When in doubt, professional assessment provides clarity and prevents well-intentioned DIY repairs that worsen the situation.
The Repair Process
For Minor, Stable Leans
If your wall shows minor lean (less than half an inch), isn’t getting worse, and you’ve identified drainage as the probable cause, you may be able to stabilize it without complete reconstruction.
Drainage Improvement Approach
Start by addressing the drainage system. Locate the drain pipe outlets (if they exist) and verify water flows freely during rain. Clear any debris blocking pipes. If you don’t see drain outlets or water doesn’t flow during rain, your wall likely lacks proper drainage which is the cause of your lean.
Improving drainage without removing the wall has limitations. You can improve surface drainage by ensuring downspouts and runoff divert away from the wall. You can add drainage along the top of the wall to reduce water infiltration. However, installing proper drain pipe at the base requires excavation that effectively means rebuilding the wall.
For truly minor leans caught very early, drainage improvement can sometimes prevent further movement. But understand this is risk management, not a true fix. Monitor carefully, and if the lean progresses despite drainage improvements, reconstruction becomes necessary before the problem worsens.
For Significant Leans
Significant lean at more than half an inch, progressive lean, or lean accompanied by other structural symptoms all require complete reconstruction. This isn’t the answer most homeowners want to hear, but it’s the only reliable solution.
Why Partial Fixes Fail
You cannot push a leaning wall back into position. The forces that moved it forward have compressed soil and shifted the foundation. Attempting to force it back risks cracking blocks, breaking the base, and creating internal stress that accelerates failure.
Temporary bracing doesn’t address root causes. It might slow progressive lean temporarily, but the underlying problems (drainage failure, inadequate base, missing reinforcement) continue working against the wall.
Trying to reinforce a leaning wall from the front with additional mass or buttressing simply adds weight to a failing foundation. You’re building on a compromised base, which rarely provides lasting stability.
Complete reconstruction allows you to address the root causes, build with proper technique, and create a wall that will remain stable for decades.
The Rebuild Process
Rebuilding a leaning retaining wall is substantial work but straightforward for walls under 36 inches. For detailed step-by-step guidance, see our comprehensive article on how to build a retaining wall and watch our retaining wall installation video.
1. Documentation and Planning
Before deconstruction, document the current wall thoroughly with photos. Measure the wall dimensions, note the block style, and count courses. This information helps you order materials and plan the rebuild.
Identify what caused the original failure. Look for missing or clogged drainage, inadequate base depth, absence of gravel backfill, or lack of setback angle. Your rebuild must address and correct these underlying causes.
2. Careful Deconstruction
Remove cap blocks first and set aside any that are undamaged for reuse. Working from the top down, carefully deconstruct each course. Many blocks can be reused if removed without damage, reducing material costs.
As you remove blocks, pay attention to what you find. Is there gravel backfill or native soil against the wall? Is there any drainage system? How deep is the base? These observations confirm or reveal the failure causes.
Remove all material down to undisturbed soil. If the base appears inadequate or the soil seems unstable, excavate deeper to create a proper foundation.
3. Address Root Causes
This is where you prevent recurrence.
If the base failed: Excavate to appropriate depth (minimum 12 inches deep for most walls). Create a base trench at least 24 inches wide. Fill with six inches of three-quarter-inch-minus gravel and compact thoroughly in two-inch lifts using a plate compactor. The base must be level and solid.
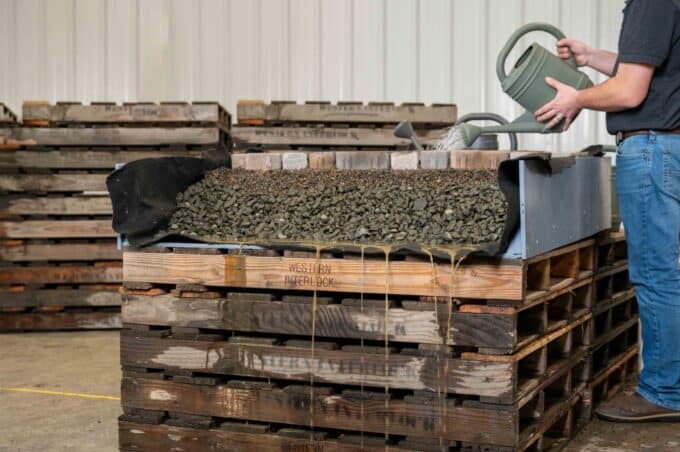
If drainage failed: This is critical. Install a complete drainage system including:
- Four-inch perforated drain pipe at the base of the wall
- Pipe sloped at minimum half-percent grade to outlet at daylight every 50 feet
- Filter fabric against the excavation wall to prevent soil migration
- Minimum 12 inches of three-quarter-inch-minus gravel backfill (never native soil against the wall)
For comprehensive guidance on designing effective drainage, see our article on designing drainage systems for retaining walls.
If setback is missing: Plan to set each course back three-quarters of an inch from the course below, creating the proper batter that leans the wall back into the retained soil.
If the wall needs reinforcement: For walls approaching 36 inches, incorporate geogrid reinforcement extending 48 inches back into the soil mass. Follow manufacturer specifications for placement and overlap.
4. Rebuild with Improvements
Set your first course on the prepared base, ensuring it’s level end to end and front to back. This course should be buried at least six inches below the finished grade in front of the wall.
As you build each course, set blocks three-quarters of an inch back from the course below (use a measuring tool to maintain consistency). Backfill behind each course with three-quarter-inch-minus gravel in four-inch lifts, compacting each lift before adding the next course.
If using geogrid, place it according to specifications (typically every 16 inches of wall height), ensuring it extends the proper distance into the backfill and is pulled taut.
Continue this process—set course, backfill, compact, repeat—until you reach your desired height. Keep the top of your gravel backfill about six inches below the top of the finished wall.
Secure cap blocks with flexible adhesive to prevent displacement while still allowing for slight movement that prevents stress cracks.
Materials and Tools
- Three-quarter-inch-minus gravel for base and backfill
- Four-inch perforated drain pipe
- Filter fabric (geotextile)
- Geogrid reinforcement (if needed for wall height)
- Plate compactor (can be rented)
- Level, string line, measuring tools
- Flexible adhesive for caps
- Replacement blocks if original blocks are damaged

Prevention: Building It Right the Second Time
The difference between a wall that leans and one that remains stable for decades comes down to proper construction addressing the factors that create stability.
Proper Drainage System
This cannot be overstated: adequate drainage prevents most retaining wall failures. A complete system includes perforated drain pipe at the wall base, sloped to outlet freely, surrounded by a minimum of 12 inches of clean gravel, all contained by filter fabric against the excavation wall. This system ensures water pressure never builds behind your wall.
Adequate Base Foundation
The base must be deeper than you might think. Six inches of compacted gravel, installed in two-inch lifts and compacted thoroughly between lifts, provides the solid foundation your wall needs. The base should be level, and the first course of blocks should be buried at least six inches below the finished grade.
On unstable soils, increase base depth and width. When in doubt about soil stability, consult a professional for soil analysis.
Correct Setback Angle
The three-quarter-inch setback per course creates a standard 12-degree batter that leans the wall back into the soil it retains. This isn’t just aesthetic—it fundamentally changes how forces act on the wall. A properly battered wall uses gravity and soil pressure to enhance stability rather than fight against it.
Proper Backfill and Compaction
Use only three-quarter-inch-minus gravel for backfill directly behind the wall. Never use native soil in this critical zone. Compact the gravel behind each course as you build—don’t wait until the wall is complete. This prevents settlement that creates voids and allows wall movement.
Geogrid Reinforcement When Needed
Walls approaching or exceeding 36 inches in height need geogrid reinforcement. This engineered fabric extends back into the soil mass, effectively enlarging the structure resisting soil pressure. Geogrid placement, length, and specifications should follow manufacturer guidelines or engineering specifications for walls over 36 inches.
When to Call a Professional
Some situations clearly require professional expertise and equipment.
Mandatory Professional Situations
- Any wall exceeding 36 inches in height (engineering required by code)
- Progressive lean that’s accelerating
- Signs of significant base or foundation failure
- Walls near structures, utilities, or property lines
- Any situation where you’re uncertain about cause or repair approach
What Professionals Provide
Professional installers bring structural assessment expertise that identifies problems DIY homeowners might miss. They have proper compaction equipment (heavy plate compactors) that achieves better results than rental equipment. For walls requiring engineering, they can provide or coordinate with engineers to ensure code compliance.
Perhaps most importantly, professionals bring experience with complex failures. They’ve seen how different soil conditions, drainage issues, and construction errors create specific failure patterns, and they know which solutions actually work long-term.
Professional installation typically includes warranty coverage, protecting your investment if unexpected issues arise.
Moving Forward with Confidence
A leaning retaining wall signals a problem that won’t self-correct. The forces that pushed your wall forward continue working, and lean typically accelerates over time. Addressing it promptly prevents a minor problem from becoming a major failure.
For minor, stable leans caught very early, drainage improvements might provide stabilization. But understand that significant lean, progressive movement, or tall walls require complete reconstruction. While rebuild sounds daunting, it’s the only approach that allows you to address root causes and create a wall that will remain stable for decades.
If you decide to tackle a rebuild yourself, work methodically. Take time on your base preparation—this is where walls are won or lost. Install a complete drainage system, not partial measures. Incorporate proper setback angle and adequate backfill compaction. Follow proven installation standards rather than taking shortcuts.
When situations exceed your capability or comfort level, professional help isn’t an admission of defeat but smart risk management. Some walls should be handled by professionals with the expertise and equipment to ensure lasting results.
Your leaning wall is telling you something went wrong during initial construction. Listen to that message. Whether you repair it yourself or hire professionals, fix it right this time. Proper base, complete drainage, correct setback, and adequate compaction prevent recurrence and give you a wall that enhances your property for generations.
Ready to plan your retaining wall project with confidence? Our Project Planning Guide walks you through every critical detail, ensuring your outdoor projects are built to last from the start. Download the guide today and build with the knowledge that prevents the problems that cause walls to lean.
Get our FREE Project Planning Guide
Tell us where to send it and we’ll email the backyard planning guide to you right away!
"*" indicates required fields