

Get our FREE Project Planning Guide
"*" indicates required fields
You’ve invested in beautiful paving stones for your outdoor space, but now you’re staring at bottles of sealer wondering: “Can I really do this myself, or should I call a professional?” It’s one of the most common questions homeowners face when maintaining their hardscape investment, and the answer isn’t always straightforward.
The decision between DIY and professional paver sealing involves more than just comparing costs. Your choice impacts the longevity of your investment, the quality of results, and your overall satisfaction with the project. Making the wrong decision can lead to costly mistakes, wasted time, or disappointing outcomes that affect your outdoor space for years to come.
This comprehensive guide will help you evaluate both approaches using the same metrics—cost analysis, time investment, quality outcomes, and risk assessment—so you can make an informed decision that’s right for your specific situation. We’ll cover when DIY makes perfect sense, when professional service is worth the investment, and provide a clear decision framework to guide your choice.
Understanding Paver Sealing: Why It Matters
The Role of Sealing in Paver Maintenance
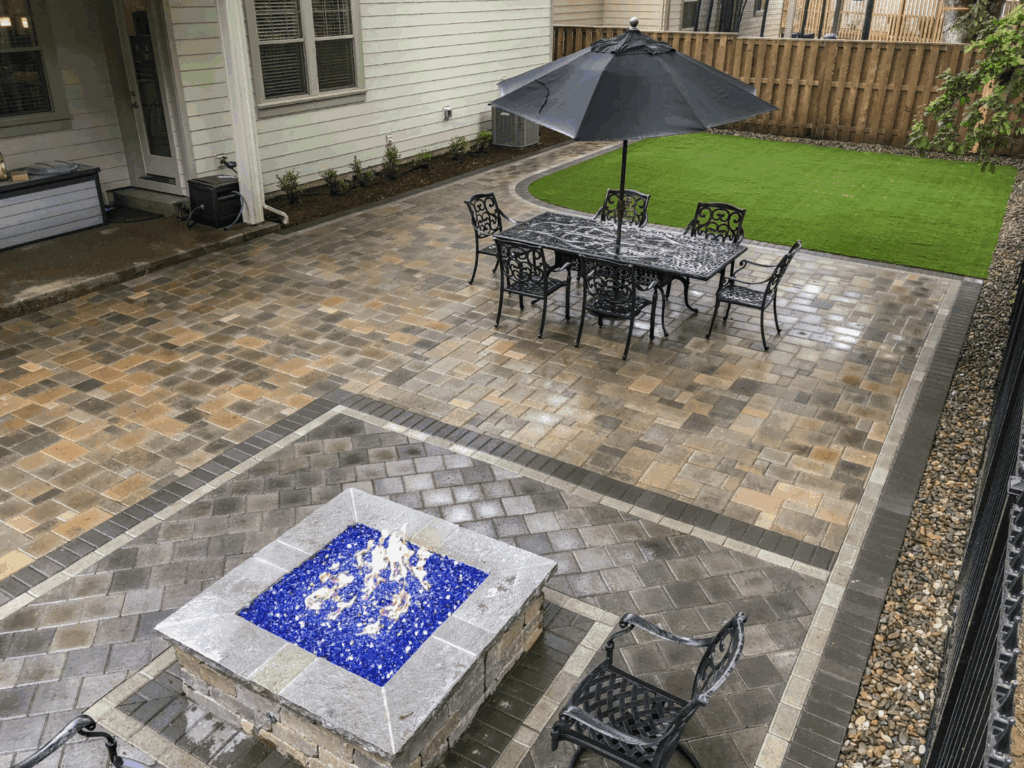
Sealing your pavers isn’t just about aesthetics—it’s about protecting your project for the long haul. A quality sealer creates a protective barrier that guards against stains, weathering, and everyday wear while enhancing the natural color and texture of your pavers. The sealer also helps stabilize joint sand, reducing weed growth and insect infiltration.
Think of sealing as insurance for your hardscape. Without it, your pavers are vulnerable to oil stains from vehicles, organic stains from leaves and debris, and gradual color fading from UV exposure. In the Pacific Northwest, where moisture is abundant, sealed pavers also resist moss and algae growth that can make surfaces slippery and unsightly.
For comprehensive information on maintaining your sealed pavers year-round, check out our guide on How to Keep Your Pavers Looking Like New: The Complete Maintenance Guide.
When Sealing Becomes Necessary
New paver installations should wait 30-60 days before the first sealing application, allowing the pavers to fully cure and any efflorescence to appear and be cleaned away. For existing pavers, the “water test” is your best indicator: when water no longer beads on the surface and instead soaks in immediately, it’s time to reseal.
High-traffic areas like driveways and main walkways typically require resealing every 2-3 years, while patios and decorative areas may last 3-5 years between applications. In our Pacific Northwest climate, the combination of rain, occasional snow, and UV exposure during summer months creates unique challenges that make regular sealing especially important.
DIY Paver Sealing: The Complete Analysis
The DIY Advantage: What You Gain
Cost Savings Potential
The most obvious benefit of DIY sealing is the potential for significant cost savings. Material costs typically range from $0.15-0.50 per square foot for quality sealer, with no labor charges or material markup. A one-time investment in basic equipment—brushes, rollers, or a sprayer—runs $100-300 and can be used for future applications.
For an average 400 square foot patio, your total investment ranges from $200-800, compared to $300-1,000+ for professional service. Over multiple resealing cycles, these savings compound significantly.
Control and Flexibility
DIY sealing puts you in complete control of timing, materials, and methods. You can choose the perfect weather window, select specific products that match your preferences, and work at your own pace without scheduling constraints. This flexibility is particularly valuable in the Pacific Northwest, where weather windows can be unpredictable.
You’ll also gain valuable knowledge about your hardscape’s condition and maintenance needs—skills that serve you well for years to come.
Satisfaction Factor
There’s genuine satisfaction in successfully completing a project that protects and enhances your outdoor investment. Many homeowners find that understanding the sealing process builds confidence for tackling other maintenance tasks and helps them spot potential issues early.
DIY Challenges: What You’re Taking On
Time Investment Reality
DIY sealing requires a significant time commitment that extends beyond the application day. Plan for 2-4 hours of research and planning, 4-8 hours of thorough surface cleaning and preparation, and 4-6 hours for the actual application. Factor in 24-48 hours of monitoring during drying and curing.
Your total time investment ranges from 10-18 hours spread over multiple days, depending on your patio size and condition. Calculate your personal hourly value to understand the true cost of this time commitment.
Learning Curve Requirements
Successful DIY sealing requires understanding different sealer types (penetrating vs. film-forming), surface preparation techniques, weather condition evaluation, and proper application methods. You’ll need to learn equipment operation, safety protocols, and troubleshooting techniques—all while working with products that can permanently affect your pavers’ appearance.
Equipment and Material Investments
Beyond the sealer itself, you’ll need cleaning supplies ($30-80), application tools ($50-150), and safety equipment including gloves, respirator, and eye protection ($25-50). If you don’t own a pressure washer, factor in rental costs or the investment in purchasing one.
Risk Factors to Consider
Mistakes in DIY sealing can be costly to correct. Common problems include weather timing errors that ruin application, incorrect product selection, uneven application creating a blotchy appearance, or inadequate surface preparation causing poor adhesion. While mistakes are learning opportunities, they often require professional intervention to fix properly.
For guidance on avoiding common pitfalls, read our article on How to Ruin a Paver Patio with Sealer to learn what not to do.
DIY Success Requirements
Essential Knowledge Areas
Success requires mastering surface dryness testing techniques, weather condition evaluation, product compatibility assessment, and proper coverage rates. You’ll need to understand when conditions are right for application and when to wait.
Our pro tip guide on sealer surface dryness testing provides professional techniques that ensure optimal conditions.
Skill Development Needed
Develop proficiency in surface preparation, even application techniques, and problem recognition. The most successful DIY projects happen when homeowners take time to practice techniques on a small, inconspicuous area first.
For step-by-step guidance, our comprehensive guide on how to seal paving stones walks you through the entire process with professional tips and techniques.
If you decide to DIY your paver sealing, be sure to check out our video on the most common paver sealing mistakes so that you can avoid any frustrating scenarios during your project.
Professional Paver Sealing: The Complete Analysis
The Professional Advantage: What You Get
Time and Convenience Benefits
Professional sealing eliminates the learning curve entirely. Your total time investment is typically 1-2 hours for consultation and final inspection, while the professionals handle everything else. Most projects are completed in 1-2 days total, with no equipment purchases, storage needs, or weather monitoring required on your part.
Experience and Expertise
Professional sealers bring years of experience across different conditions, paver types, and climate challenges. They can diagnose surface issues before sealing, recommend the best products for your specific situation, and solve problems immediately as they arise. This expertise is particularly valuable for complex layouts, damaged surfaces, or challenging weather conditions.
Quality Assurance
Professional application ensures consistent, even coverage with proper surface preparation every time. Most reputable contractors offer material warranties and application guarantees, backed by insurance coverage for potential issues. They also have access to professional-grade products and equipment that may not be available to homeowners.
Professional Service Investment
Cost Considerations
All-inclusive professional sealing typically costs $0.75-2.50 per square foot, including labor and materials. For an average 400 square foot patio, expect to invest $300-1,000, with additional costs possible for surface repairs or special treatments.
Professional services include material markup (10-30% above retail prices) and may have minimum project size requirements or travel fees for smaller jobs. However, this investment includes expertise, equipment, insurance, and guarantees that DIY cannot provide.
Scheduling and Availability Factors
Seasonal demand affects professional availability, especially during ideal sealing weather in spring and fall. Weather dependency can delay projects, and you’ll have less flexibility in timing compared to DIY approaches. Quality and methods can vary between contractors, making research and selection crucial.
When to Choose DIY vs Professional
DIY Makes Sense When:
Project Characteristics:
- Smaller areas (under 500 square feet)
- Standard rectangular patios without complex features
- Good weather window availability
- Non-critical timing for completion
Personal Factors:
- You enjoy learning new skills and techniques
- Adequate time available for proper preparation
- Comfortable with detailed, methodical work
- Budget constraints favor material-only costs
Skill and Equipment:
- Basic home improvement experience
- Access to pressure washing equipment
- Comfortable with safety equipment and procedures
Professional Service Makes Sense When:
Project Characteristics:
- Large areas (over 1,000 square feet)
- Complex layouts with multiple levels or features
- Problematic surfaces requiring expertise
- Time-sensitive completion requirements
Personal Factors:
- Limited time for multi-day projects
- Prefer guaranteed results with warranty protection
- Uncomfortable with chemical handling or safety risks
- Value convenience over cost savings
Complexity Factors:
- Previous sealer removal required
- Surface repairs needed before sealing
- Matching existing sealed areas
- High-value investment requiring guaranteed outcomes
Decision Framework Questions
Project Assessment:
- What’s the square footage and complexity of your area?
- What’s your timeline and available weather window?
- Do you have the necessary tools and safety equipment?
- What’s your comfort level with detailed preparation work?
Budget Evaluation:
- Calculate total DIY costs including your time value
- Get professional quotes for comparison
- Consider long-term maintenance implications
- Factor in warranty and guarantee value
Risk Tolerance Assessment:
- How critical are perfect first-time results?
- Can you afford mistake recovery costs?
- Do you have backup timing flexibility?
- Is learning the process valuable to you?
The Right Choice for Your Situation
Neither DIY nor professional sealing is universally “better”—the right choice depends on your specific situation, skills, timeline, and priorities. A small, straightforward patio with an experienced DIY homeowner can achieve excellent results with proper preparation and patience. A large, complex hardscape with tight timing requirements often benefits from professional expertise and efficiency.
The key is honest self-assessment. Consider your available time, comfort with the learning curve, budget constraints, and tolerance for potential mistakes. Both approaches can deliver excellent results when executed properly with the right preparation and quality products.
Whatever approach you choose, understanding the sealing process helps you make informed decisions, communicate effectively with professionals if you hire them, and maintain your investment properly for years to come.
Ready to plan your hardscaping project? Download our free Project Planning Guide to help you evaluate your specific situation, compare your options, and make the best decision for your next hardscape project. This comprehensive resource includes cost calculators, timing guidelines, and decision trees tailored specifically for you.
Get our FREE Project Planning Guide
Tell us where to send it and we’ll email the backyard planning guide to you right away!
"*" indicates required fields


