Get our FREE Project Planning Guide
"*" indicates required fields
Do you have a seating wall made of paving stones that you are ready to uplevel? If so, you may want to consider integrating some lighting into it to make it usable and beautiful at all times of day.
Here at Western Interlock, we are committed to providing you with quality and accessible resources for hardscaping your yard.
In this blog post, we are covering how to install aesthetic lighting into your paving stone bench or outdoor seating area.
Step 1: Prepare the area
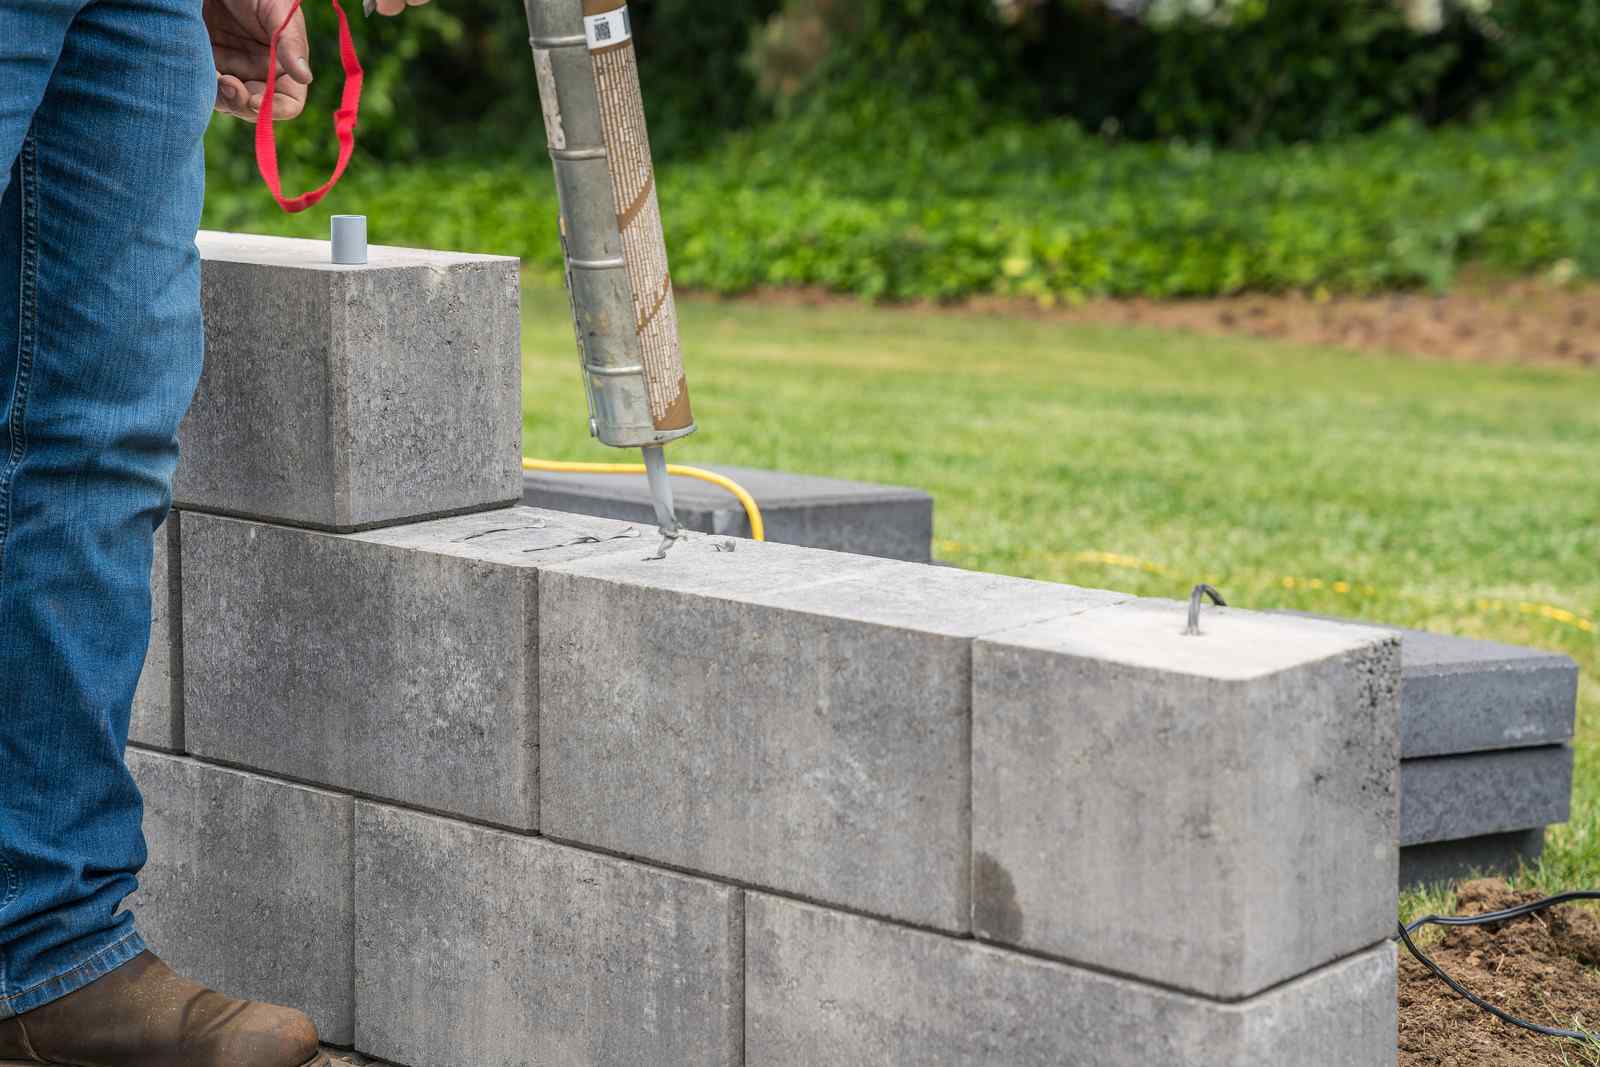
If you are adding lights to an existing seating wall, you first need to remove your capstones. Once you place your lights there, you will have to grind the blocks to ensure they sit flush.
If you haven’t installed your seating area yet but know you will want lights in it, make sure you drill holes and make room for the lights as you go through the installation process.
Step 2: Design and layout
As you decide where each light will go, make sure you install an odd number of lights for the best curb appeal. Whatever lights you select, take your time and make sure everything is spaced out and centered on your bench.
Once you have decided on the layout and number of lights, use a paver marker to mark where each light will go.
Step 3: Measure and mark
Use a grinder with a diamond cup wheel (specifically made for concrete blocks) to grind out the area from the top stones so that it will sit flush and flat when you put our capstones back on.
Grind a notch to go along the bench for your lead wire so that it will not rock or move once it is complete.
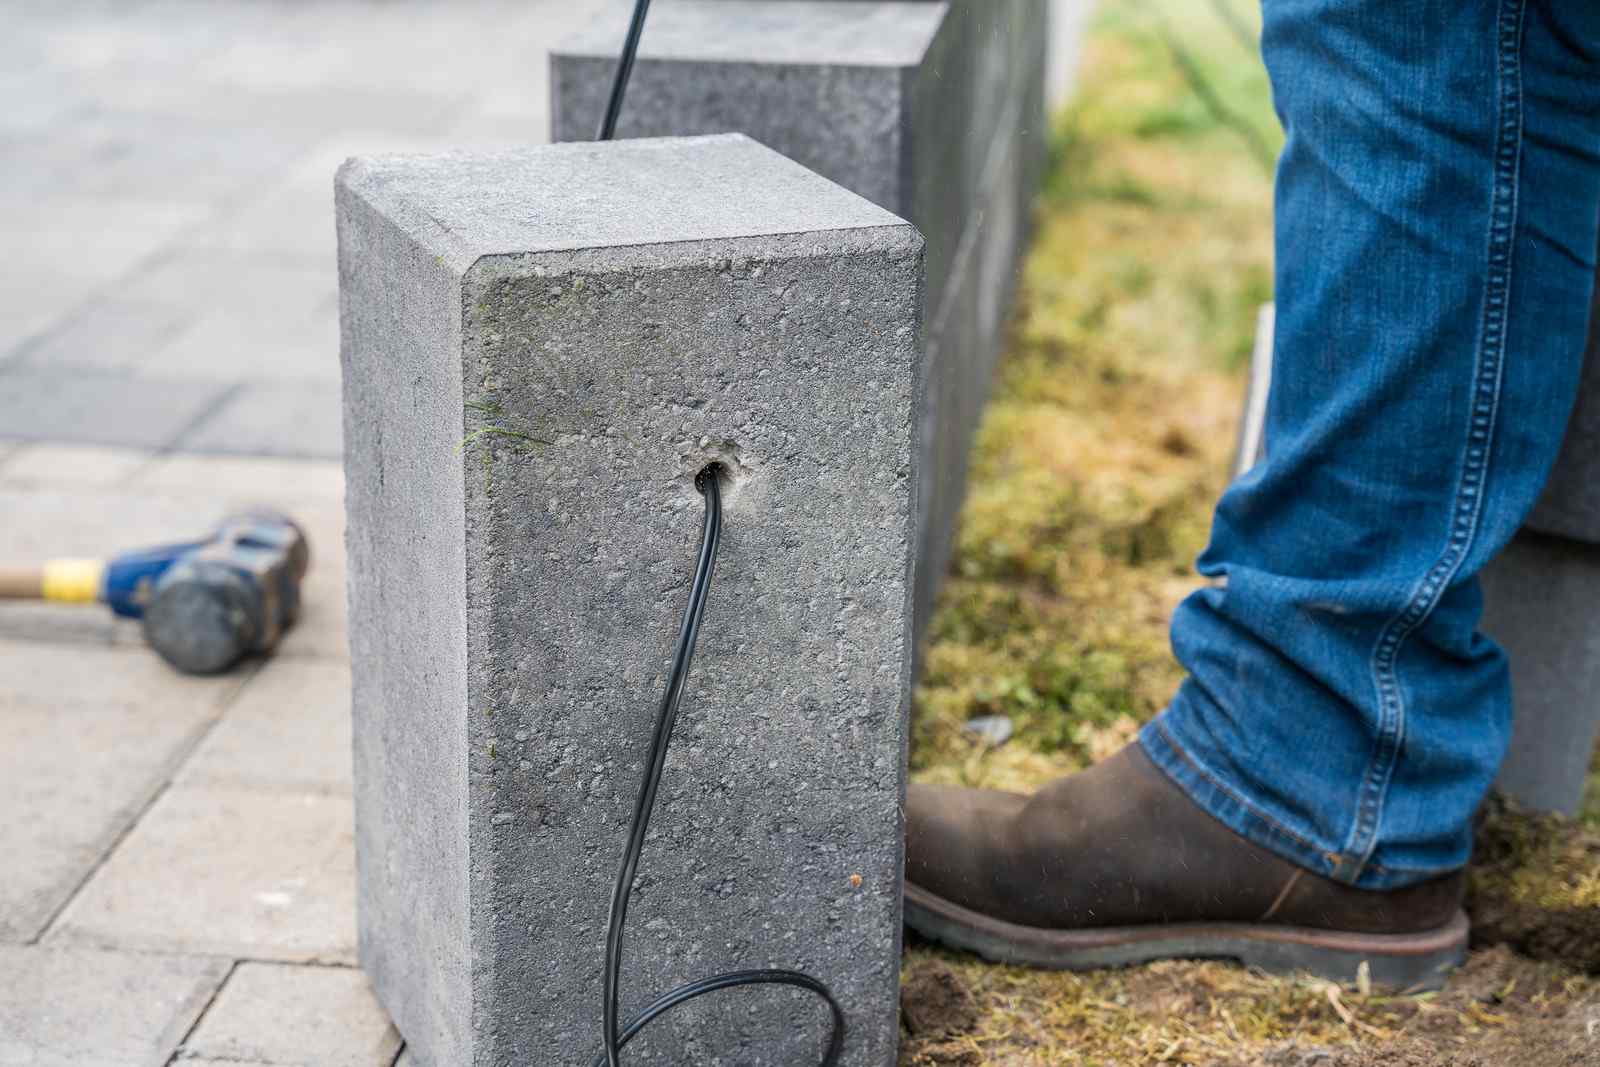
Step 4: Drill outlets for the lead wire
Once everything is marked and ground out, take a hammer drill with a concrete bit and drill through the layers of block for your lead wire.
Measure carefully to ensure the hold in each block is perfectly centered. Otherwise, your blocks may not fit back together once you have run your lead wire through the holes.
Step 5: Connect the lighting
Once everything is ready, you can start running your lead wire through the conduit to the transformer. Bury the conduit a few inches below ground, run the wire from your bench, through the holes in the paving stones, and then connect it to the conduit.
If you are installing one light, take your lead wire, connect it to the heat shrink connectors, and then have your wire from your light go in the opposite end.
If you are installing multiple lights, use the daisy chain method; this means that you have your lead wire coming into the heat shrink connector from your light and then have additional lead wire that goes into the other lights. Then, you loop it all together and on the last light hook your lead wire to the light wire.
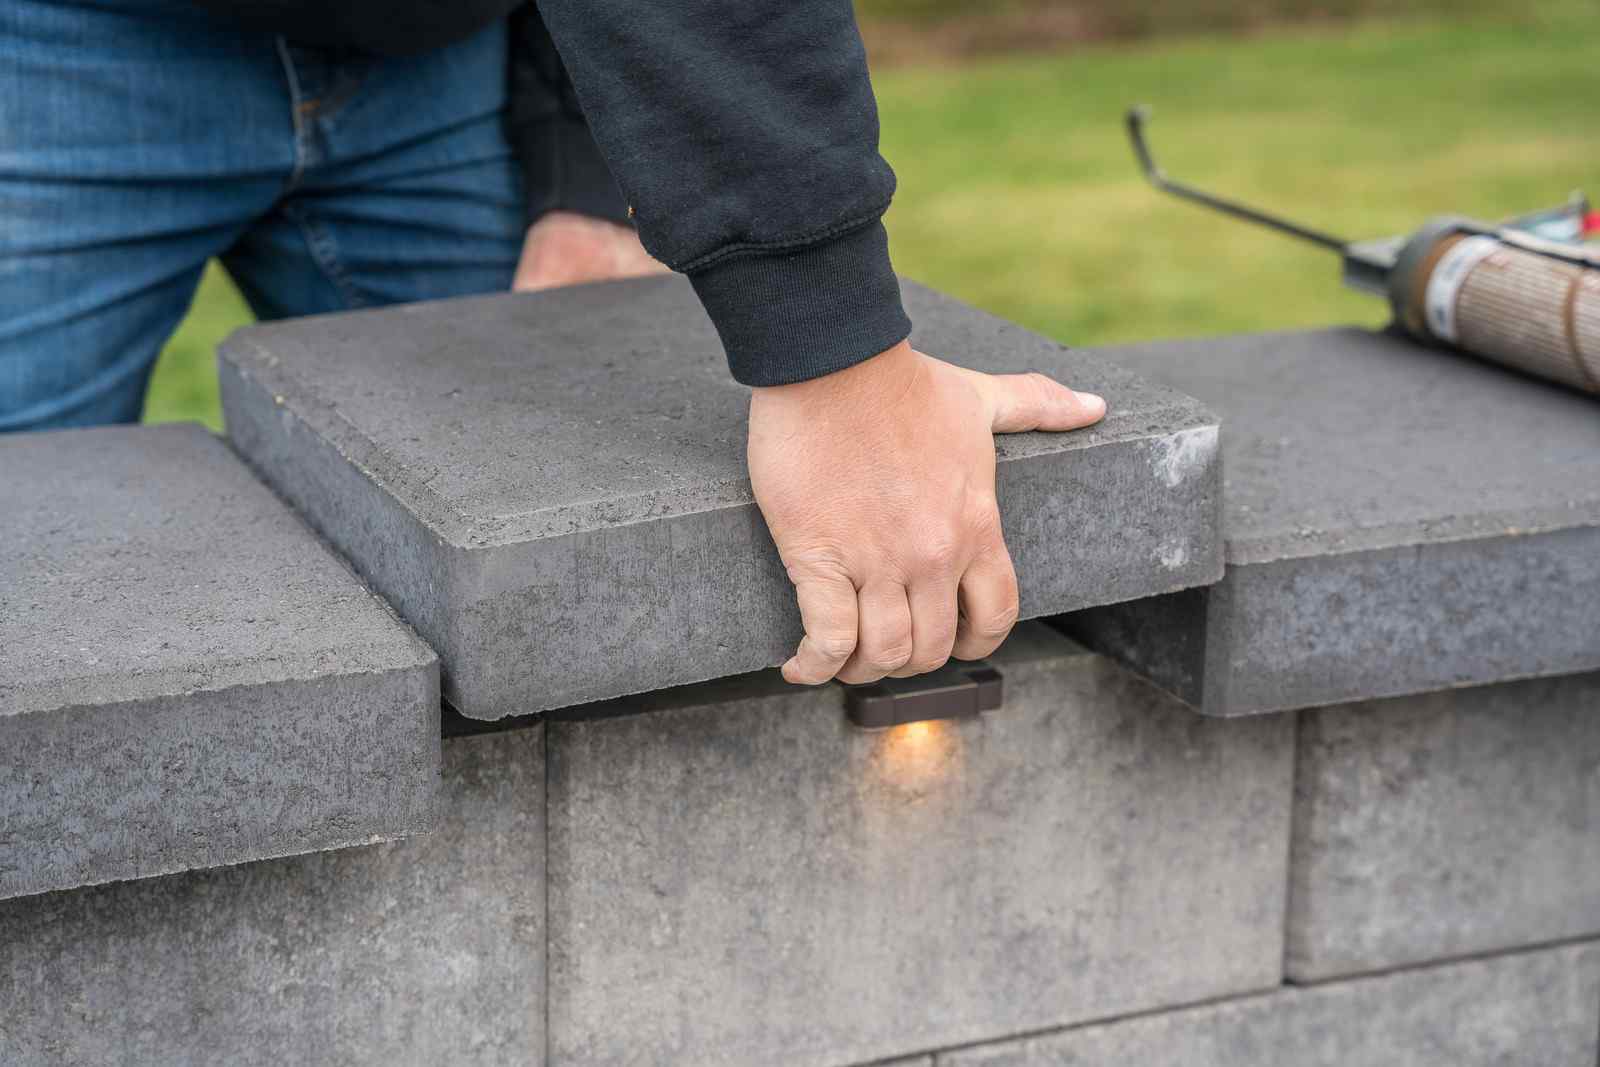
Step 6: Finish installation
Now that all your lights are connected, plug your transformer in to make sure everything works. Before you glue on your capstones, set them on your seating wall or bench without using any glue to make sure everything fits tight and flat in case you need to make a little more room for the lights. Then, go back individually, lift up one capstone at a time, put the glue down, and then install or re-install the capstone.
Finally, touch up your landscaping to make sure everything looks finished and clean.
Explore additional resources
Are you ready to get started with your hardscape process? You can click here to check out our selection of paving stones, or check out our DIY with WI page for access to tutorials, guides, and more. Our team will be happy to assist you with any questions or personalized advice you need for your paver lighting or any other part of your project.
Get our FREE Project Planning Guide
Tell us where to send it and we’ll email the backyard planning guide to you right away!
"*" indicates required fields