
Get our FREE Project Planning Guide
"*" indicates required fields
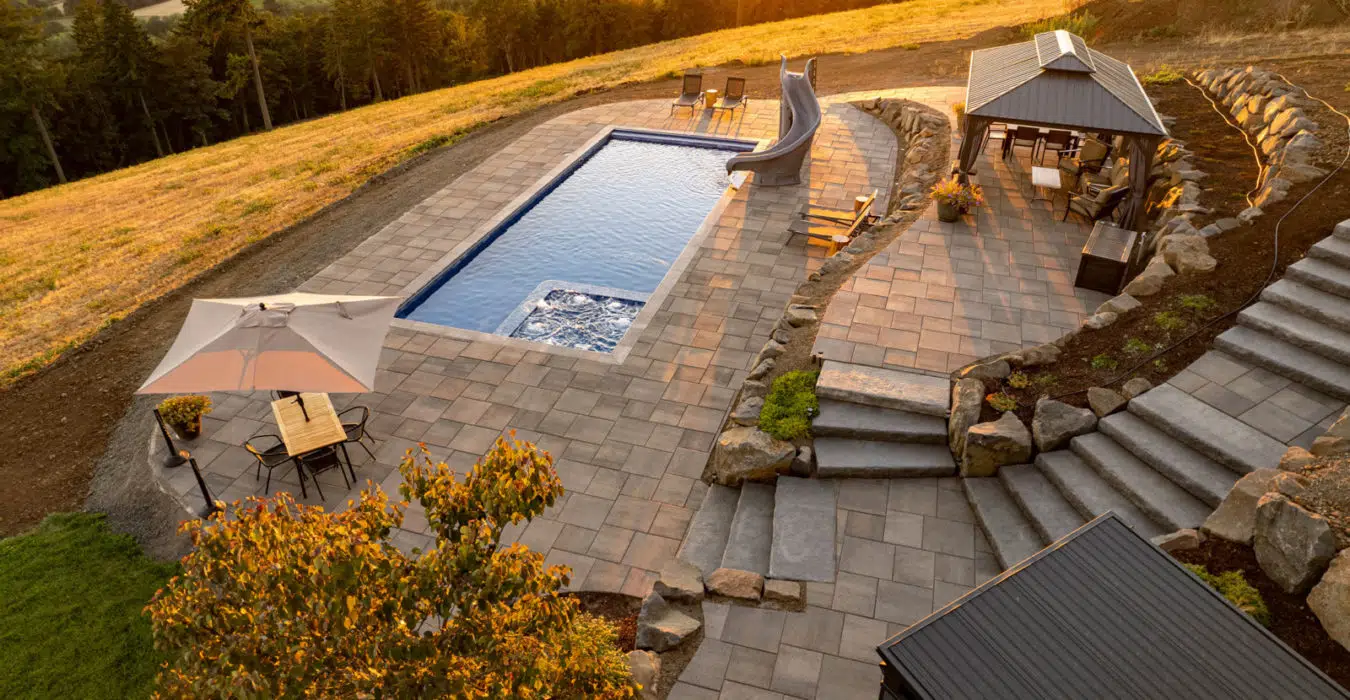
In this article, we’ll look at how to use pavers to build the exact outdoor space you’ve been dreaming up—one that is versatile, welcoming, and a place your family and friends want to be.
Why design an outdoor living space with pavers
What are the advantages of using pavers to create your outdoor space?
Pavers are wonderful in that most paver projects can be done on your own. Any landscaping improvement adds value to your home, but hardscaping is unique in that it can extend your living space into the outdoors. Pavers also offer the benefit of improving the appearance of your home’s property without adding the maintenance that comes with other types of landscaping, such as mowing grass or pruning trees and bushes.
You can get our step-by-step Project Planning Guide for free, but let’s take an abbreviated look at the steps you will need to take as you consider the process of installing pavers.
Steps to designing and planning your outdoor living space
Let’s take a big-picture look at the steps your paver project will involve.
1. Create a vision
You must first ask yourself what it is you want to build. If you have an already existing outdoor space that is functional, you may want to just add a firepit to increase the appeal and extend the times of year you can use the space. Or, if you are establishing an outdoor area, you might want to tackle a new paver patio. In either of these scenarios, adding a paver walkway can be a beautiful touch that makes your property more cohesive and inviting.
2. Measure your space
Next, you will want to measure the space where you intend to install the pavers. You need to make sure you know what dimensions you are working with so that you can then find out how much material you need to purchase.
3. Draft your plan
Once you have your selected area measured, you will need to draft a plan on paper. Use grid or graph paper to make it visually easy to draw, and make sure you draw it to the specifications of the space you are using. Use a pencil to erase, or prepare to go through at least a few sheets of paper as you draft.
4. Mark out your plans
This is the step where you start working with the area you have chosen to hardscape! Get some special white marking paint and mark the corners and significant boundary points of the area in which you plan to work. This will help you understand the space and help your paper plans make 3D sense. Visualizing the dimensions of your project can also be a fun way to motivate you to keep going.
5. Decide on your pavers
Now that you can picture the boundaries and specifications of the area you will be improving, move on to picturing exactly what type of pavers you want to use in the space. What color of pavers do you prefer? What texture? Do you want something more modern or more old-style? Do you prefer standard-sized pavers or smaller, brick-style ones? Check out our Paver Finder to get recommendations for what might work well with your space and preferences.
6. Get a quote
The final thing to do before you begin is to get a quote on how much your selected pavers will cost. You can shop around to get an accurate estimate of the material you will need and the price. Check out local stores to see how their costs and quality compare to one another. You can also use our Get a Quote feature and we will be more than happy to answer any questions you may have.
Download our Project Planning Guide
If you would like to get a few more details before you start on your project, check out our free Project Planning Guide. This guide will give you even more details for these necessary steps! Click here to download it for yourself.
Get our FREE Project Planning Guide
Tell us where to send it and we’ll email the backyard planning guide to you right away!
"*" indicates required fields


