
Get our FREE Project Planning Guide
"*" indicates required fields
There’s nothing quite like gathering around a warm fire on a cool evening. Whether you’re roasting marshmallows or just enjoying the ambiance, having a comfortable place to sit makes all the difference. If you’re building or upgrading your outdoor space, adding seating around your fire pit using pavers is a practical and beautiful solution. In this guide, we’ll show you how to build a DIY-friendly curved paver bench that matches your fire pit—and lasts for years. We make it easy to add seating around your fire pit!
Why Add Seating Around Your Fire Pit?
Built-in paver seating offers several benefits:
- Durability: Unlike wood or plastic, paver benches won’t rot or warp.
- Low Maintenance: Once installed, they require little upkeep.
- Cohesive Look: Paver seating blends seamlessly with your patio or fire pit design.
- Customizable: You can build them straight or curved to match your space.
Let’s walk through the steps to add this stylish and functional feature to your fire pit area.
Add Seating Around Your Fire Pit: Tools & Materials You’ll Need
Before you get started, make sure you’ve got the right tools on hand. Building a curved paver bench is a manageable DIY project, especially when you’re prepared.
Essential Tools
- Tape Measure — For spacing your bench evenly around the fire pit.
- Rubber Mallet — To nudge blocks into place without damaging them.
- Level — Ensures your bench is stable and safe to sit on.
- Masonry Saw or Circular Saw with Diamond Blade — For trimming capstones to fit the curve.
- Caulking Gun — To apply masonry adhesive cleanly and efficiently.
- Marking Pencil or Chalk — Useful when laying out cuts or spacing blocks.
- PPE (Personal Protective Equipment) — Safety glasses, gloves, dust mask, and hearing protection for cutting and handling materials.
Materials
- Chateau Moderna™ Beveled Blocks — For the curved bench base.
- Chateau 100s — To cover gaps and complete the layout.
- Capstones — The finishing layer that makes the bench comfortable and polished.
- Masonry Adhesive — To bond each course securely.
- Compacted Gravel (if no patio base exists) — At least 4” for a stable foundation.
💡 Pro Tip: Renting a masonry saw or block splitter from your local equipment rental store can save time and deliver cleaner cuts, especially when working with curves.

Step 1: Design with the Fire Pit in Mind
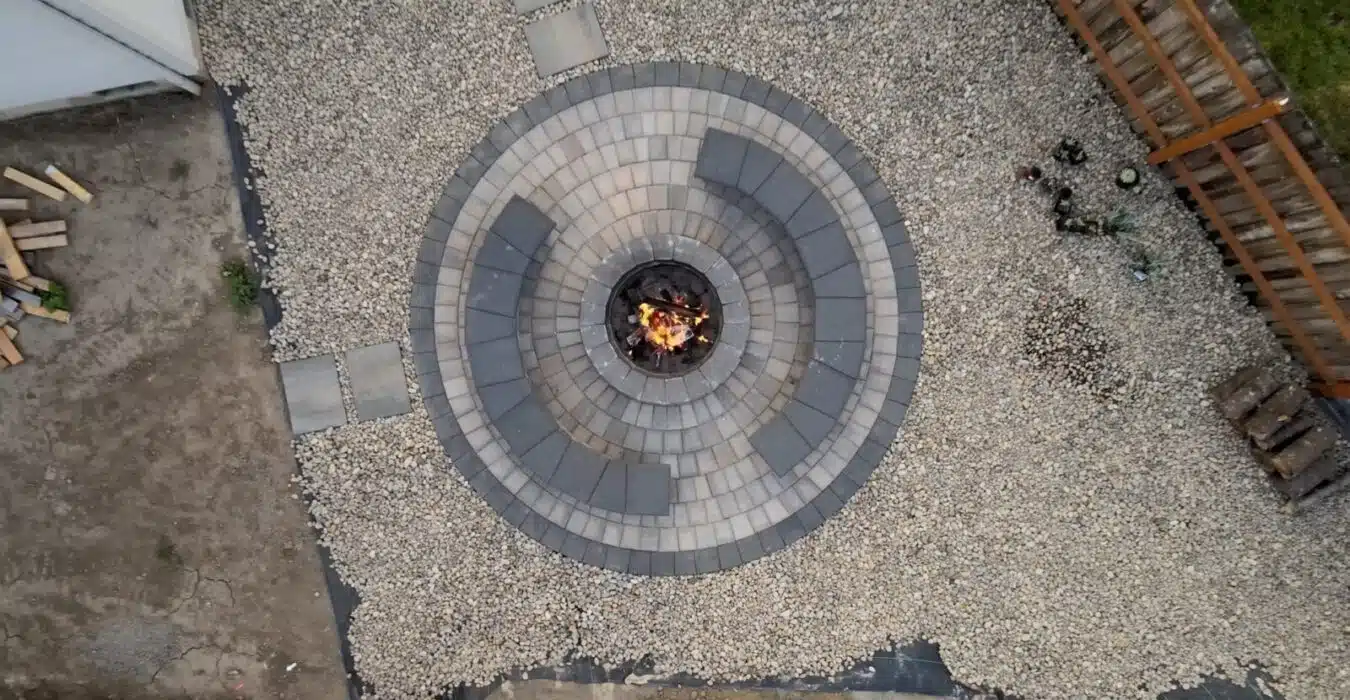
Start with a plan. If your fire pit is round—like our Rotundo Circle System—a curved bench will complement its shape and improve flow. A well-thought-out layout ensures your bench looks intentional and feels comfortable.
We used Chateau Moderna™ Beveled and Chateau 100s for our curved bench system. These blocks enable minimal cutting and a smooth curve, making the process more efficient for DIY’ers.

Step 2: Lay Out Your Bench
The key to a clean layout is alignment. Begin by placing the back of your block (such as a Chateau Beveled) on a seam in one of the fire pit’s circular rings. This trick ensures a consistent arc.
Next, test the distance from the front of your bench to the fire pit. Aim for about two feet of space (we measured 22.5”), which is just right for comfort and safety. This step helps visualize spacing and maintain balance between your seating and fire feature.
💡 Pro Tip: Leave small gaps between multiple benches for drainage, allowing water to flow off the patio surface.
Step 3: Prepare the Base
If your bench is being built on top of an existing paver patio, you’re already set with a compacted gravel base. If not, you’ll need to prepare a foundation with at least 4” of compacted gravel to provide stability and prevent shifting over time.

Step 4: Stack and Glue Courses
Once your base course is laid, begin stacking additional courses. Use a masonry adhesive to glue each layer securely.
As you build, keep checking your height. A comfortable bench is usually around 18” tall, including the cap. Because capstones are thinner than wall blocks, you’ll want to dry-fit and measure as you go to make sure the finished height feels right.
For added strength and visual appeal, use half-blocks to offset seams. Alternating seams adds stability and a polished finish.

Step 5: Add the Cap Stones
Top your bench with a capstone layer. Since the bench is curved, expect to make a few cuts for a snug, custom fit.
Need help with cuts? Check out our tutorial: Six Ways to Cut a Paving Stone for step-by-step guidance.
Add Seating Around Your Fire Pit: Common Questions
How many blocks do I need?
This depends on the size and length of your bench. Start by sketching your curve and measuring total length to estimate how many blocks per course you’ll need.
Can I build a straight bench instead?
Absolutely! While curved benches pair beautifully with round fire pits, straight benches can be easier to build and suit rectangular patios.
What products should I use?
We recommend Chateau Moderna™ Beveled for curves and Chateau 100s for filling gaps. These blocks are designed to work together and offer a clean, uniform look.
Build the Gathering Space You’ve Always Wanted: Add Seating Around Your Fire Pit
A built-in paver bench transforms your fire pit from a backyard feature into a true outdoor living space—one that invites people to linger, laugh, and connect. With the right materials and a bit of planning, this is a project any confident DIYer can tackle.
If you’re planning a fire pit upgrade or a full patio build, Western Interlock offers premium pavers and retaining wall systems that make your vision possible. Visit our Product Selection to find the perfect match, and check out DIY with WI for more tutorials and how-tos.
Get our FREE Project Planning Guide
Tell us where to send it and we’ll email the backyard planning guide to you right away!
"*" indicates required fields


